Pies & Tarts
Classic Apple Pie

The Apple Pie That Changed Everything for Me
There is something almost spiritual about making an apple pie from scratch. The smell of butter browning in the crust, the cinnamon curling up from the filling as it bubbles, that satisfying crackle when you break through the top crust with your first serving spoon — it all adds up to something far greater than the sum of its ingredients. This is the pie that taught me what baking really means, and I have been chasing that feeling with every recipe since.
I grew up watching my grandmother roll out pie dough on a flour-dusted wooden board in her kitchen. She never measured anything, working entirely by feel and decades of muscle memory. Her apple pies were legendary in our neighborhood, and for years I assumed they were impossible to replicate without her particular brand of kitchen intuition. It took me about four years and somewhere around fifty attempts to develop a recipe that captured what made her pies so special — a shattering, flaky crust that practically dissolved on the tongue, and a filling that balanced sweetness with that bright, almost tangy apple flavor.
This recipe is the result of all that obsessive testing. Every proportion has been measured, adjusted, and measured again. I have tried every apple variety available at my local market, experimented with different thickening agents, and tested more crust techniques than I care to admit. What I landed on is a pie that feels classic and familiar but tastes noticeably better than what most people grew up eating. The secret is in the details, and I am going to walk you through every single one.
Why This Apple Pie Recipe Works
The Crust Uses Both Butter and Shortening
Most pie crust recipes ask you to choose sides: butter for flavor or shortening for flakiness. After extensive testing, I found that a combination of both gives you the best of both worlds. The butter provides that rich, toasty flavor that makes a pie crust taste like a pie crust, while a small amount of shortening creates extra-tender layers. The ratio matters — too much shortening and the crust tastes flat; too little and you lose that melt-in-your-mouth tenderness.
The Apple Mix Is Intentional
Using a single variety of apple is the most common mistake in pie baking. Granny Smiths alone are too tart and firm. Honeycrisps alone break down into mush. Combined, they create a filling with complexity — some slices hold their shape for texture while others soften into a saucy, jammy base. This contrast is what separates a good apple pie from an extraordinary one.
Cornstarch Is the Right Thickener
I have tested flour, tapioca starch, and cornstarch as filling thickeners. Cornstarch produces the cleanest flavor and the most appealing, slightly glossy texture. Flour can make the filling taste pasty and starchy, while tapioca sometimes creates an oddly stringy consistency. Two tablespoons of cornstarch is the sweet spot for a filling that sets without being gummy.
Step-by-Step Guide to the Perfect Apple Pie
Making the Crust by Hand
I strongly prefer making pie crust by hand rather than in a food processor. Yes, it takes a few more minutes, but you have much better control over the texture. The goal is to have a mixture of different-sized butter pieces in your flour: some the size of peas (these create flaky layers) and some the size of coarse sand (these provide tenderness throughout). A food processor works so quickly that it often produces a uniform texture, which means you lose that layered flakiness.
When adding ice water, go slowly. You want to add just enough that the dough holds together when squeezed — it should look shaggy and somewhat dry. If you add too much water, the gluten in the flour develops more, and your crust becomes tough. I add water one tablespoon at a time and check after each addition by squeezing a handful of the mixture. When it holds together without crumbling apart, you are done.
The resting time in the refrigerator is non-negotiable. Cold dough is easier to roll, and the resting period allows the gluten to relax, which prevents shrinking in the oven. One hour is the minimum, but overnight is even better.
Preparing the Apples
Peel and slice your apples about 1/4 inch thick. Consistency matters here — if some slices are thin and others are chunky, they will cook unevenly, leaving you with a mix of mushy and underdone fruit. A sharp knife or a mandoline set to 1/4 inch makes quick work of this.
Tossing the sliced apples with sugar and spices and letting them sit for 15 minutes is a technique called macerating. The sugar draws moisture out of the apples, which accomplishes two things: it concentrates the apple flavor, and it reduces the amount of liquid in the pie so your filling sets properly. You will notice a pool of juice at the bottom of the bowl — pour this into the pie along with the apples. The cornstarch will thicken it as it bakes.
The Two-Temperature Baking Method
Starting the pie at a high temperature and then reducing the heat is the key to avoiding a soggy bottom crust. The initial blast of 425°F heat rapidly sets the bottom crust and begins caramelizing the sugars on the top crust. After 20 minutes, dropping to 375°F allows the filling to cook through gently without burning the edges. If you notice the crust browning too quickly at any point, tent the edges loosely with aluminum foil.
Place the pie on a rimmed baking sheet before it goes into the oven. Apple pies bubble over more often than not, and cleaning baked-on apple syrup from the bottom of your oven is not how anyone wants to spend their evening.
The Patience of Cooling
This is where most people trip up, and I completely understand why. You have a gorgeous, golden, fragrant pie sitting on your counter, and every instinct screams to cut into it immediately. But if you slice an apple pie before it has cooled for at least two hours, the filling will run everywhere. The cornstarch needs time at lower temperatures to fully gel. Think of it as the final step in the baking process — the pie is still cooking, just more slowly.
If you absolutely cannot wait the full two hours, 90 minutes will give you a filling that mostly holds, though it will be a bit looser than ideal. Warming individual slices in a 350°F oven for 10 minutes before serving is a wonderful compromise — you get the warm pie experience with a filling that actually stays on the plate.
My Favorite Variations
Brown Butter Apple Pie
For an incredibly nutty, toffee-like depth, brown the butter before adding it to the crust and the filling. Melt the butter in a saucepan over medium heat until it turns amber and smells like toasted hazelnuts, then chill it until solid before using it in the crust. This single change transforms the flavor profile entirely.
Salted Caramel Apple Pie
Drizzle about 1/3 cup of homemade or store-bought salted caramel sauce over the apples before adding the top crust. The caramel melts into the filling as it bakes, creating pockets of buttery sweetness that contrast beautifully with the tart apples. If you enjoy my pecan pie, you will love the similar depth of flavor this variation offers.
Cheddar Crust Apple Pie
This sounds unusual if you have never tried it, but sharp cheddar cheese in pie crust is a New England tradition that goes back generations. Replace 1/2 cup of the flour with 1/2 cup of finely shredded sharp cheddar. The cheese adds a savory, umami note that makes the sweet filling pop.
Essential Tips for Success
Keep everything cold. This cannot be overstated. Cold butter in pie crust creates steam pockets as it melts in the oven, and those steam pockets are what give you flaky layers. If the dough feels warm or sticky at any point, slide it back into the refrigerator for 15 minutes before continuing.
Use a glass pie dish. Glass conducts heat evenly and lets you check the color of the bottom crust without guessing. You want the bottom to be golden brown, not pale and doughy. A quick peek at the underside through the glass tells you everything you need to know.
Do not skip the lemon juice. It seems like a minor ingredient, but lemon juice serves two purposes: it prevents the apples from oxidizing and turning brown, and it brightens the overall flavor of the filling. Without it, the filling can taste flat and one-dimensional.
Invest in a good rolling pin. A heavy French rolling pin — the kind without handles — gives you the most control and the most even results. Tapered ends let you apply more pressure to the center or edges as needed. It was the single best baking purchase I have ever made.
How to Store Apple Pie
At room temperature: Cover loosely with aluminum foil or place in a pie keeper. Apple pie stays fresh at room temperature for about 2 days. The crust will start to soften after that.
In the refrigerator: Wrap the pie well or store in an airtight container. Refrigerated apple pie keeps for up to 5 days. Reheat individual slices in a 350°F oven for about 10 minutes to refresh the crust.
In the freezer: You can freeze either a baked or unbaked pie. For unbaked, assemble the pie completely, wrap tightly in plastic wrap and then aluminum foil, and freeze for up to 3 months. Bake from frozen at 425°F for 25 minutes, then reduce to 375°F and continue for about 50 minutes. For baked pies, cool completely first, then wrap and freeze. Thaw overnight in the refrigerator and reheat in a 350°F oven.
Frequently Asked Questions
Can I use store-bought pie crust? You can, and there is no shame in it. Pillsbury refrigerated pie crusts are the best store-bought option I have found. That said, the homemade crust in this recipe is truly special and worth the extra effort when you have the time.
How many apples do I need? About 3 pounds, which works out to roughly 7 medium apples. After peeling and slicing, you will have about 8 cups. The mound of apples in the unbaked pie will look enormous, but they shrink significantly as they cook.
Why did a gap form between my filling and top crust? As apples cook, they release steam and shrink. This is completely normal. Macerating the apples before assembling reduces this gap, but some space is almost unavoidable. If it bothers you, gently press the top crust down toward the filling about 10 minutes after removing the pie from the oven.
Common Mistakes and How to Avoid Them
Using only one type of apple. I mentioned this earlier, but it bears repeating because it is the most common error I see. A single variety gives you a one-dimensional filling. Granny Smith alone is too tart and firm. Honeycrisp alone turns to applesauce. The combination creates layers of flavor and texture that make the pie interesting.
Not chilling the dough long enough. Room temperature pie dough is sticky, tears easily, and shrinks dramatically in the oven. A full hour in the refrigerator relaxes the gluten and solidifies the butter, both of which are essential for a crust that holds its shape and has distinct flaky layers. If you are short on time, 30 minutes in the freezer works as a substitute.
Skipping the bottom baking sheet. Apple pie filling bubbles vigorously during baking, and the juices frequently overflow the edges of the pie dish. Placing the pie on a rimmed baking sheet catches these drips and saves you from a smoke-filled kitchen and an unpleasant cleanup.
Cutting too soon. I understand the temptation, truly. But two hours of cooling is the minimum for a filling that holds its shape. The starches in the cornstarch need to cool and gel to do their thickening work. A pie cut at one hour will taste wonderful but will pool across the plate.
Over-working the pie dough. Every time you handle pie dough, you develop more gluten, which makes the crust tougher. Mix until the dough barely holds together — it should look shaggy and dry. It will come together beautifully when you press it into a disc and refrigerate.
Serving Suggestions
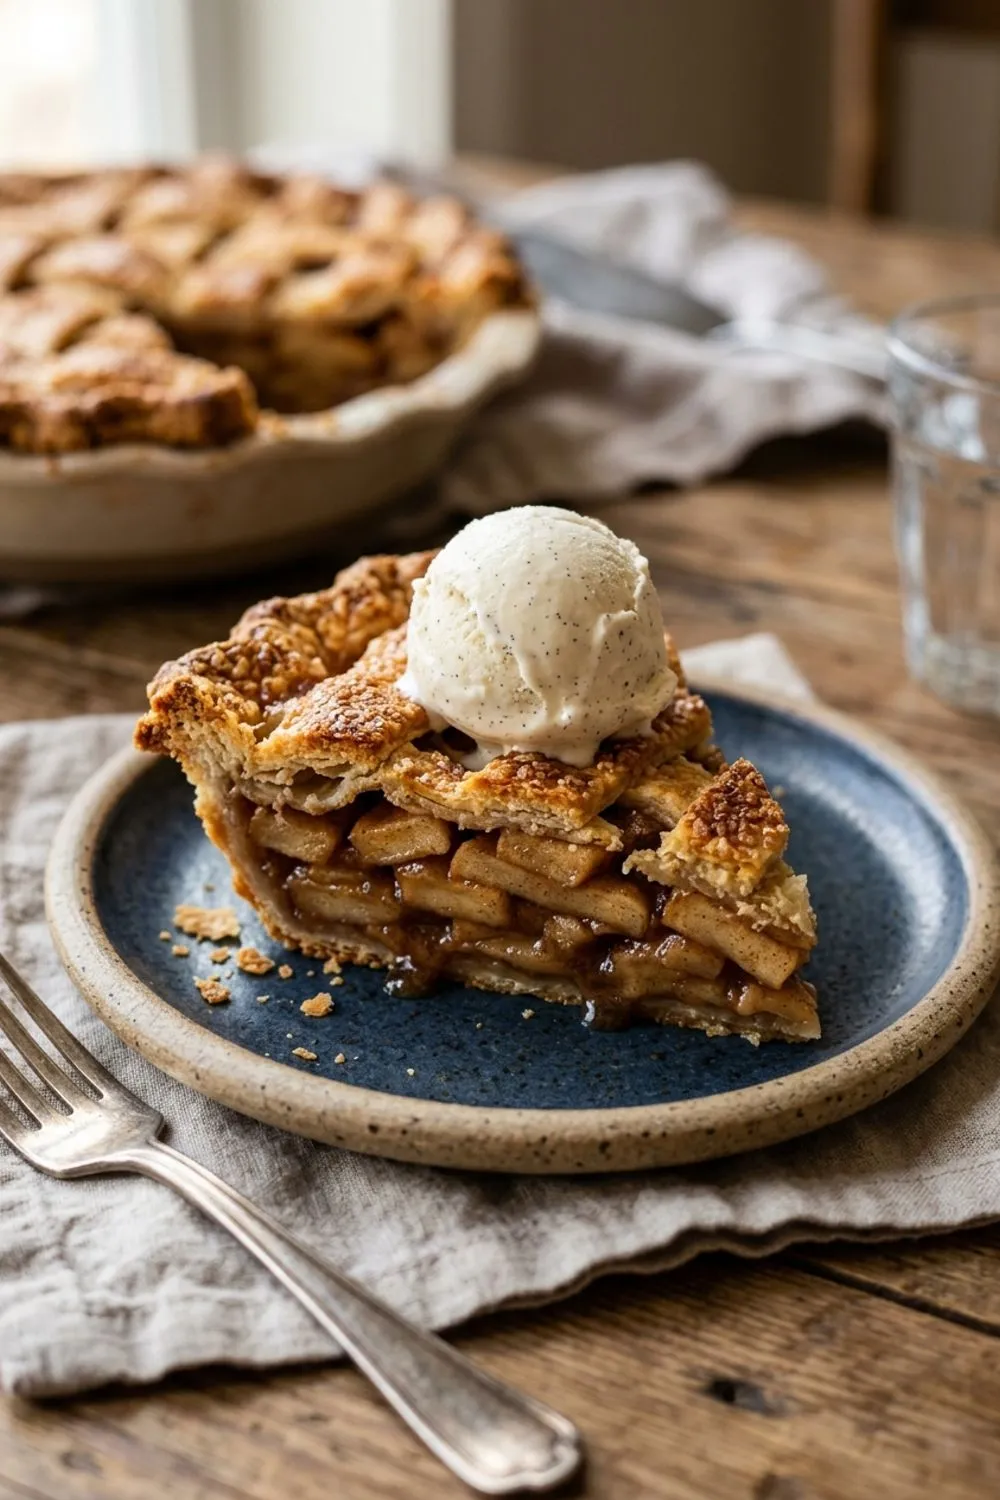
A warm slice of apple pie is spectacular on its own, but the right accompaniment takes it to another level. Classic vanilla ice cream is the obvious choice, and for good reason — the cold creaminess against the warm, spiced filling is one of the great flavor combinations in dessert. Sharp cheddar cheese is traditional in parts of New England and offers a savory contrast that I find completely addictive. A drizzle of salted caramel sauce or a generous spoonful of freshly whipped cream are also wonderful options.
For a holiday spread, this pie sits beautifully alongside my pumpkin pie and key lime pie. Having two or three pies on the table gives your guests options and makes the occasion feel truly special.
Never Miss a Sweet Recipe
Join 5,000+ home bakers and get new recipes straight to your inbox.
Ingredients
Flaky Pie Crust
Apple Filling
Egg Wash
Instructions
- 1
Make the Pie Crust
Whisk flour, sugar, and salt in a large bowl. Add the cold cubed butter and shortening. Using a pastry cutter or your fingertips, work the fat into the flour until the mixture resembles coarse crumbs with some pea-sized pieces remaining. Drizzle in ice water one tablespoon at a time, mixing gently with a fork until the dough just holds together when squeezed. Divide the dough into two discs, wrap each tightly in plastic wrap, and refrigerate for at least 1 hour or up to 2 days.
- 2
Prepare the Apple Filling
Peel, core, and slice the apples into roughly 1/4-inch thick slices. In a large bowl, toss the apple slices with granulated sugar, brown sugar, cinnamon, nutmeg, cornstarch, and lemon juice. Let the mixture sit for about 15 minutes while you roll out the crust — this draws out some juice and helps the filling set properly.
- 3
Roll and Line the Pie Dish
On a lightly floured surface, roll one disc of dough into a 12-inch circle, about 1/8 inch thick. Carefully transfer to a 9-inch pie dish, pressing gently into the corners. Trim the overhang to about 1/2 inch. Roll out the second disc of dough for the top crust, or cut strips for a lattice design. Refrigerate both while you preheat the oven.
- 4
Assemble the Pie
Preheat the oven to 425°F (220°C) with a rack in the lower third. Pour the apple filling into the lined pie dish, mounding the apples slightly in the center. Dot the top of the filling with the small pieces of butter. Place the top crust over the apples and crimp the edges to seal, or weave a lattice top. Cut 4 small slits in a solid top crust to allow steam to escape.
- 5
Apply Egg Wash and Bake
Beat the egg with cream and brush generously over the top crust. Sprinkle with coarse sugar. Place the pie on a rimmed baking sheet to catch drips. Bake at 425°F for 20 minutes, then reduce the temperature to 375°F (190°C) and continue baking for 30–35 minutes, until the crust is deep golden brown and the filling is bubbling through the vents.
- 6
Cool Before Slicing
Remove the pie from the oven and let it cool on a wire rack for at least 2 hours before slicing. This cooling time is essential — it allows the filling to set so your slices hold together beautifully. Serve warm or at room temperature with a scoop of vanilla ice cream.
Nutrition Information
Per serving (serves 8). Values are approximate.
| Calories | 340 calories |
| Total Fat | 15g |
| Saturated Fat | 7g |
| Carbohydrates | 48g |
| Sugar | 28g |
| Protein | 4g |
| Sodium | 200mg |
| Fiber | 2g |
* Percent Daily Values are based on a 2,000 calorie diet. Your daily values may be higher or lower depending on your calorie needs. Nutritional information is an estimate and may vary.
Frequently Asked Questions
What are the best apples for apple pie?
A mix of tart and sweet apples gives the best flavor. I recommend Granny Smith for tartness and structure combined with Honeycrisp for sweetness and juiciness. Braeburn and Jonagold also work wonderfully.
Can I make apple pie ahead of time?
Absolutely. You can prepare the dough up to 2 days ahead and refrigerate it. The assembled pie can be frozen unbaked for up to 3 months — bake from frozen, adding about 15 extra minutes to the bake time.
Why is my apple pie filling runny?
The two most common causes are not using enough cornstarch and cutting the pie before it has cooled completely. The filling needs at least 2 hours at room temperature to set properly.
How do I prevent a soggy bottom crust?
Bake on the lower oven rack, use a rimmed baking sheet underneath, and make sure your oven is fully preheated. Starting at a higher temperature (425°F) also helps seal the bottom crust quickly.

Reader Reviews
Based on 267 reviews