No-Bake Desserts
Chocolate Truffles

Why Homemade Truffles Are Worth Every Minute
Walk into any upscale chocolate shop and you’ll see truffles priced at two to three dollars each, arranged behind glass like tiny jewels. They look impossibly refined, the kind of thing that could only be made by someone with years of pastry school training and a marble slab worth more than your car. And every time I see those displays, I think the same thing: I can make better ones at home for a fraction of the cost.
I don’t say that to be contrarian. I say it because chocolate truffles are genuinely one of the easiest, most rewarding things you can make in a kitchen. The base is ganache — chocolate and cream — which is about as simple as cooking gets. You warm cream, pour it over chocolate, stir until smooth, chill, scoop, roll, and coat. That’s it. No oven, no thermometer, no specialized equipment. Just two ingredients, your hands, and a little patience.
The result is a truffle that melts the moment it hits your tongue, releasing a wave of pure, intense chocolate flavor that no mass-produced candy can match. When you make truffles at home with good chocolate, you taste the chocolate itself — its terroir, its roast, its complexity. There’s nothing hiding behind layers of sugar and stabilizers. It’s chocolate in its most honest, luxurious form.
I started making truffles about eight years ago as holiday gifts, and they’ve become my signature. Every December, friends and coworkers start asking “are you making the truffles this year?” The answer is always yes, because a batch of 24 truffles takes less than 30 minutes of active work and costs about six dollars in ingredients. Compared to buying a box of artisan truffles, that’s practically free.
Choosing Your Chocolate
Since the truffle is essentially just chocolate and cream, the quality of your chocolate matters enormously. This is not the place for chocolate chips or baking squares from the bottom shelf. You want a chocolate bar with a short ingredient list — cocoa mass, sugar, cocoa butter, maybe vanilla — and a cacao percentage between 60% and 70%.
At 60%, you’ll get truffles that are sweeter and more approachable — the kind that appeals to everyone, including people who claim they don’t like dark chocolate. At 70%, the truffles have more complexity and a slight bitterness that chocolate enthusiasts love. I usually land at 65% for a truffle that balances richness and accessibility.
Chop the chocolate as finely as you can. The smaller the pieces, the more surface area is exposed to the hot cream, which means faster and more even melting. I use a large serrated knife and a cutting board, chopping with a rocking motion. A food processor works too — pulse in short bursts until you have small, uniform chips.
Brands I trust for truffles: Valrhona (the gold standard for pastry chefs), Guittard, Scharffen Berger, and Lindt Excellence bars. Even a good dark chocolate bar from the grocery store works well — Ghirardelli and Green & Black’s are solid choices. Just avoid anything labeled “chocolate-flavored” or with vegetable oil in the ingredient list.
The Science of Ganache
Ganache is an emulsion — fat droplets suspended in liquid, similar in principle to mayonnaise or vinaigrette. The chocolate provides the fat (cocoa butter) and the cream provides the liquid (water content). When properly made, these two components form a stable, glossy, silky mixture that’s greater than the sum of its parts.
The ratio of chocolate to cream determines the ganache’s final texture. For truffles, I use a 2:1 ratio by weight — 8 ounces of chocolate to about 4 ounces (1/2 cup) of cream. This produces a firm ganache that scoops cleanly and holds its shape when rolled. If you want a softer center, increase the cream to 2/3 cup. For an even firmer truffle, reduce it to 1/3 cup.
The Stirring Technique
How you stir ganache matters more than you’d expect. When you pour the hot cream over the chocolate, let it sit for two full minutes before touching it. This patience allows the heat to distribute evenly and begin melting the chocolate from all sides.
When you start stirring, begin in the very center of the bowl with small, tight circles. You’ll see the chocolate and cream start to come together in the middle, forming a thick, shiny paste. Gradually widen your circles outward, pulling in more unmelted chocolate each time. By the time you reach the edges of the bowl, the ganache should be completely smooth and glossy.
This center-out technique prevents the ganache from breaking (separating into a greasy, grainy mess). Vigorous stirring from the start splashes cold cream onto the edges, where it meets too much unmelted chocolate and can’t emulsify properly. Slow and steady from the center out gives you a perfect emulsion every time.
The Butter Makes a Difference
A lot of truffle recipes skip the butter entirely, and the truffles are still good. But the two tablespoons I add makes a genuinely noticeable difference. The butter adds a silky smoothness to the ganache that cream alone doesn’t provide, and it rounds out the flavor with a subtle richness.
Use unsalted butter at room temperature, cut into small pieces. Cold butter won’t incorporate smoothly and could cause the ganache to seize. Add it after the chocolate and cream are fully combined, stirring until each piece melts and disappears.
If you’re making truffles for someone who’s dairy-free, you can substitute coconut oil for the butter. It adds a slightly different flavor but works well texturally.
Rolling Without the Mess
I won’t lie to you: rolling truffles is messy. The chocolate melts from the heat of your hands, your fingers get coated in ganache, and the whole operation can feel like a slow-motion disaster if you’re not prepared. But a few strategies keep the mess manageable and make the process almost enjoyable.
Work cold. Before you start rolling, run your hands under the coldest water you can stand, then dry them thoroughly. Cold hands melt the chocolate more slowly, giving you more time to shape each truffle.
Work in batches. Roll 6-8 truffles, then wash and re-chill your hands before continuing. Keep the remaining ganache portions in the fridge while you work.
Embrace imperfection. Real French truffles aren’t perfectly round — they’re named after the knobby fungi they resemble. A slightly rough, irregular shape is authentic and charming. If you’re spending 30 seconds trying to perfect each sphere, you’re working against yourself and warming the chocolate too much.
Use a cookie scoop. A small (#60 or 1-tablespoon) cookie scoop with a spring release makes portioning dramatically easier and more consistent than using a spoon. It’s a three-dollar tool that saves you minutes and mess.
Coating Possibilities
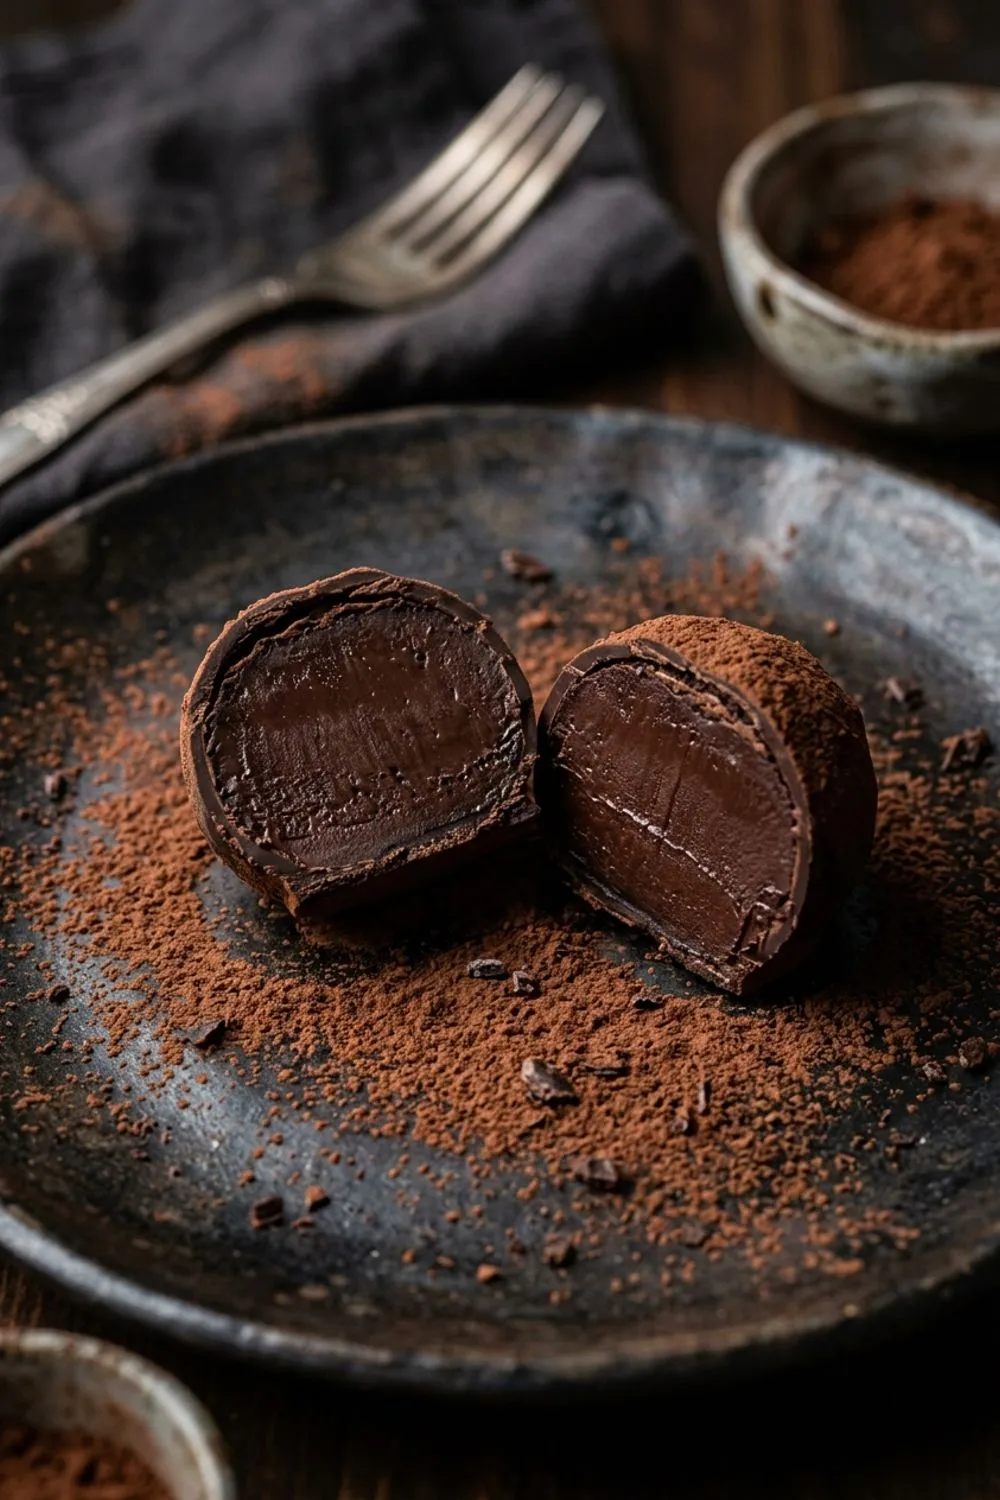
The classic cocoa powder coating is my favorite — it’s simple, elegant, and allows the ganache flavor to shine. Use Dutch-process cocoa for its deeper color and smoother flavor, though natural cocoa works fine too.
For variety, here are my other go-to coatings:
Toasted hazelnuts, finely chopped: This turns your truffles into something resembling a gianduja — the Italian chocolate-hazelnut combination. Toast hazelnuts in a dry skillet until fragrant, rub off the skins in a towel, then chop finely.
Shredded coconut: Lightly toast it first for extra flavor. The coconut adds a pleasant textural contrast to the smooth ganache.
Crushed freeze-dried raspberries: Beautiful pink color, intense berry flavor, and a light crunch. The tartness plays beautifully against the rich chocolate.
Finely ground pistachios: Gorgeous green color and a sophisticated nutty flavor. These are the truffles I make when I want to impress.
Powdered sugar: Simple and sweet, with a beautiful snowy appearance. Best for milk chocolate truffles.
Flavor Variations
The base ganache is a canvas for whatever flavor you want to add. Here are my tested favorites:
Espresso Truffles: Dissolve 1 teaspoon of instant espresso powder in the hot cream before pouring over the chocolate. The coffee deepens the chocolate flavor without making the truffles taste like coffee.
Orange Truffles: Add 1 tablespoon of Grand Marnier and the finely grated zest of one orange to the finished ganache. Classic combination.
Salted Caramel Truffles: Swirl 2 tablespoons of salted caramel sauce into the finished ganache before chilling. Top each rolled truffle with a single flake of sea salt.
Champagne Truffles: Replace 2 tablespoons of the cream with champagne or sparkling wine. The alcohol adds a subtle fizzy quality that’s incredibly elegant.
Spiced Truffles: Add 1/4 teaspoon of ground cinnamon and a pinch of cayenne to the melted ganache. The heat sneaks up on you after a beat and makes these genuinely exciting.
Gifting and Presentation
Homemade truffles are one of the best edible gifts you can give. They look impressive, taste luxurious, and the fact that you made them by hand adds a personal touch that money can’t buy.
For gifting, arrange truffles in small paper candy cups inside a decorative box or tin. Line the box with wax paper or tissue paper first. A small card listing the flavors adds a professional touch. Truffles ship well overnight in insulated packaging during cool weather, though I wouldn’t risk it in summer.
For a dinner party, arrange a variety of coated truffles on a slate board or dark plate. The contrast of cocoa-dusted, nut-rolled, and raspberry-coated truffles creates a stunning display that doubles as a conversation piece.
Storage Guidelines
Refrigerator: Store in a single layer in an airtight container, separated by parchment paper if stacking, for up to 2 weeks. The cocoa coating may absorb some moisture over time — if the truffles look dull, give them a quick re-roll in fresh cocoa before serving.
Freezer: Truffles freeze beautifully for up to 2 months. Flash-freeze on a parchment-lined tray, then transfer to an airtight container. Thaw in the refrigerator overnight, then let them come to room temperature for 5-10 minutes before eating.
Room temperature: Truffles can sit at a cool room temperature (below 70°F/21°C) for up to a day. Any warmer and they’ll start to soften and lose their shape.
The Story Behind Chocolate Truffles
Chocolate truffles were invented in 1895 by French patissier Louis Dufour in Chambery, a town in the French Alps near the Italian border. The story goes that Dufour ran out of supplies during the Christmas rush and improvised a confection from ganache scraps rolled in cocoa powder. He noticed the result bore a striking resemblance to the prized truffle mushroom — dark, lumpy, dusted with earth — and the name stuck.
What Dufour stumbled upon was actually a brilliant insight: that chocolate ganache, the simplest of all chocolate preparations, could stand on its own as a finished confection. Before truffles, ganache was primarily used as a filling or frosting. The idea that you could scoop it, roll it, and serve it as-is was revolutionary in its simplicity.
Today, chocolate truffles are made in every country that has access to chocolate, and regional variations abound. Belgian truffles tend to feature hard chocolate shells filled with softer ganache. Swiss truffles are often made with milk chocolate and heavy cream for a particularly silky texture. American truffles lean sweeter and often incorporate unusual flavors like bourbon, lavender, or chili. But the French original — dark chocolate ganache rolled in cocoa powder — remains the gold standard for purity of flavor and elegance of concept.
Making truffles at home connects you to that tradition in a visceral way. When you roll ganache between your palms and dust it with cocoa, you’re performing essentially the same action that Dufour performed in his Alpine kitchen over a century ago. There’s something deeply satisfying about that continuity, about making something by hand that could just as easily be bought but tastes immeasurably better when you make it yourself.
Pairing Truffles with Drinks
Chocolate truffles are outstanding on their own, but they reach another level when paired thoughtfully with beverages. Here are my favorite combinations:
Espresso: A classic pairing. The bitterness of the coffee amplifies the chocolate’s depth without competing with it. Serve one truffle alongside a small espresso for the most elegant end to a dinner party.
Red wine: A bold, fruit-forward red like Zinfandel or Malbec works beautifully with dark chocolate truffles. The tannins in the wine interact with the cocoa butter in interesting ways, and the fruit notes complement the chocolate’s complexity.
Port or dessert wine: The sweetness of a tawny port or Pedro Ximenez sherry is a match made in heaven with slightly bitter dark chocolate truffles. This is my favorite late-night pairing.
Whiskey: A smooth bourbon or single malt Scotch pairs remarkably well with truffles, especially those made with a touch of espresso or sea salt. The vanilla and caramel notes in aged whiskey echo the warmth of the chocolate.
If you love working with ganache, you’ll enjoy my chocolate mousse recipe, which uses a similar chocolate-melting technique but takes the texture in a completely different direction. For another pure chocolate indulgence, my fudge recipe is rich and foolproof. And if you want to master ganache itself as a sauce, glaze, or filling, check out my chocolate ganache guide.
Never Miss a Sweet Recipe
Join 5,000+ home bakers and get new recipes straight to your inbox.
Ingredients
For the ganache
For coating and variations
Instructions
- 1
Heat the cream
Pour the heavy cream into a small saucepan and set over medium heat. Warm until it just begins to simmer — you'll see small bubbles forming around the edges and steam rising from the surface. Don't let it reach a full boil, as overheated cream can cause the chocolate to seize.
- 2
Make the ganache
Place the finely chopped chocolate in a medium heatproof bowl. Pour the hot cream over the chocolate and let it sit undisturbed for 2 minutes — this allows the heat to penetrate and begin melting the chocolate without agitation. Starting from the center of the bowl, stir slowly in small circles with a spatula, gradually widening until the chocolate and cream form a smooth, glossy emulsion. Add the butter pieces and vanilla (and espresso or liqueur, if using) and stir until completely incorporated.
- 3
Chill the ganache
Press a piece of plastic wrap directly onto the surface of the ganache to prevent a skin from forming. Refrigerate for at least 2 hours, or until the ganache is firm enough to scoop and roll — it should feel like thick cookie dough when you press it. If it's too soft, chill longer. If it's rock-hard, let it sit at room temperature for 10-15 minutes.
- 4
Scoop the truffles
Using a small cookie scoop or a teaspoon, portion the ganache into roughly 1-inch balls — you should get about 24 truffles. Place them on a parchment-lined baking sheet. Don't worry about making them perfectly round at this stage; you'll shape them in the next step. If the ganache starts getting too soft as you work, pop the sheet back in the fridge for 10 minutes.
- 5
Roll into balls
Working quickly, roll each portion between your palms to form a rough sphere. Your hands will melt the chocolate fast, so work in batches — roll 6-8 truffles, then refrigerate the sheet while you wash and dry your hands with cold water. The truffles should be round but don't need to be perfectly smooth — a slightly rustic shape is part of their charm.
- 6
Coat in cocoa powder
Place the cocoa powder in a shallow bowl. Drop a few truffles at a time into the cocoa and roll gently until evenly coated. Transfer to a clean parchment-lined tray. If desired, sprinkle a few flakes of sea salt on top of each truffle while the cocoa coating is fresh. Refrigerate for at least 15 minutes to firm up before serving.
Nutrition Information
Per serving (serves 24). Values are approximate.
| Calories | 95 calories |
| Total Fat | 7g |
| Saturated Fat | 4g |
| Carbohydrates | 8g |
| Sugar | 6g |
| Protein | 1g |
| Sodium | 5mg |
| Fiber | 1g |
* Percent Daily Values are based on a 2,000 calorie diet. Your daily values may be higher or lower depending on your calorie needs. Nutritional information is an estimate and may vary.
Frequently Asked Questions
Why did my ganache break or look greasy?
Broken ganache (where the fat separates from the chocolate) usually happens when the cream is too hot, the chocolate is low quality, or you stirred too vigorously at the start. To rescue it, add 1 tablespoon of cold cream and stir vigorously from the center — this often re-emulsifies the mixture. If that doesn't work, briefly blend it with an immersion blender.
Can I use milk chocolate?
Yes! Use the same amount of milk chocolate, but reduce the cream to 1/3 cup since milk chocolate has more sugar and cocoa butter and needs less liquid. The truffles will be sweeter and creamier. White chocolate truffles work too — use 1/4 cup of cream for 8 oz of white chocolate.
How long do truffles last?
Stored in an airtight container in the refrigerator, truffles keep for 2 weeks. They can also be frozen for up to 2 months. Let refrigerated truffles sit at room temperature for 5-10 minutes before eating — they're best when slightly cool but not fridge-cold.
What other coatings can I use?
Beyond cocoa powder, try rolling truffles in finely chopped toasted nuts (hazelnuts, almonds, or pistachios), shredded coconut, powdered sugar, crushed freeze-dried raspberries, or tempered chocolate for a hard shell. Each coating gives the truffles a different character.
Do I need to temper chocolate for truffles?
No! That's the beauty of ganache-based truffles — the cream prevents the chocolate from needing tempering. The cocoa powder coating hides any bloom or imperfections. Tempered chocolate dipping is an option for a glossy, snappy shell, but it's completely unnecessary for the cocoa-rolled version.

Reader Reviews
Based on 189 reviews