Quick & Easy
Microwave Brownies
Why You’ll Love These Microwave Brownies
I need to make a confession. I am a brownie purist. I believe in properly baked brownies with crackly tops, fudgy centers, and that particular chew that comes from butter, chocolate, and patience. I have spent years developing my oven-baked brownie recipe, and I am proud of every variation I have shared on this site.
And yet. Here we are. Microwave brownies.
Because here is the thing about being a brownie purist: sometimes you want a brownie at ten o’clock at night and you do not want to wait 45 minutes for the oven to preheat and bake and cool. Sometimes it is July and turning on the oven feels like an act of self-destruction. Sometimes you are at someone else’s house and they do not have any baking sheets but they have a microwave and a bowl and you have a desperate need for chocolate.
These microwave brownies exist for those moments. They are not trying to replace your favorite baked brownie recipe — they are filling a different role entirely. They are the emergency brownie. The shortcut brownie. The I-need-chocolate-in-fifteen-minutes brownie. And within that specific niche, they are really, genuinely good.
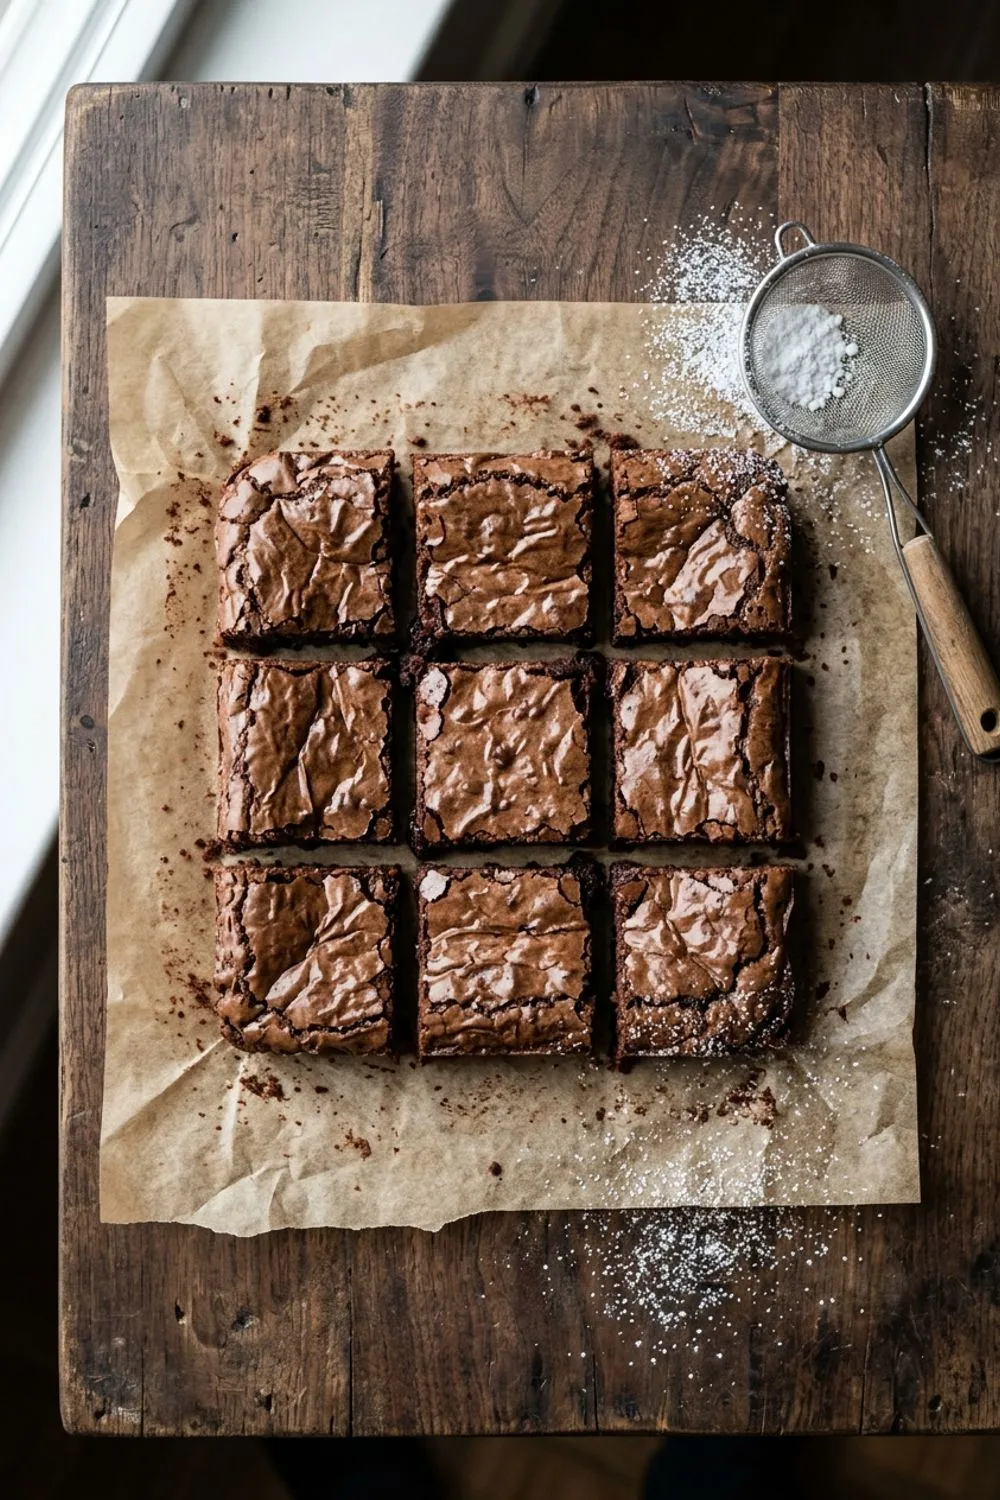
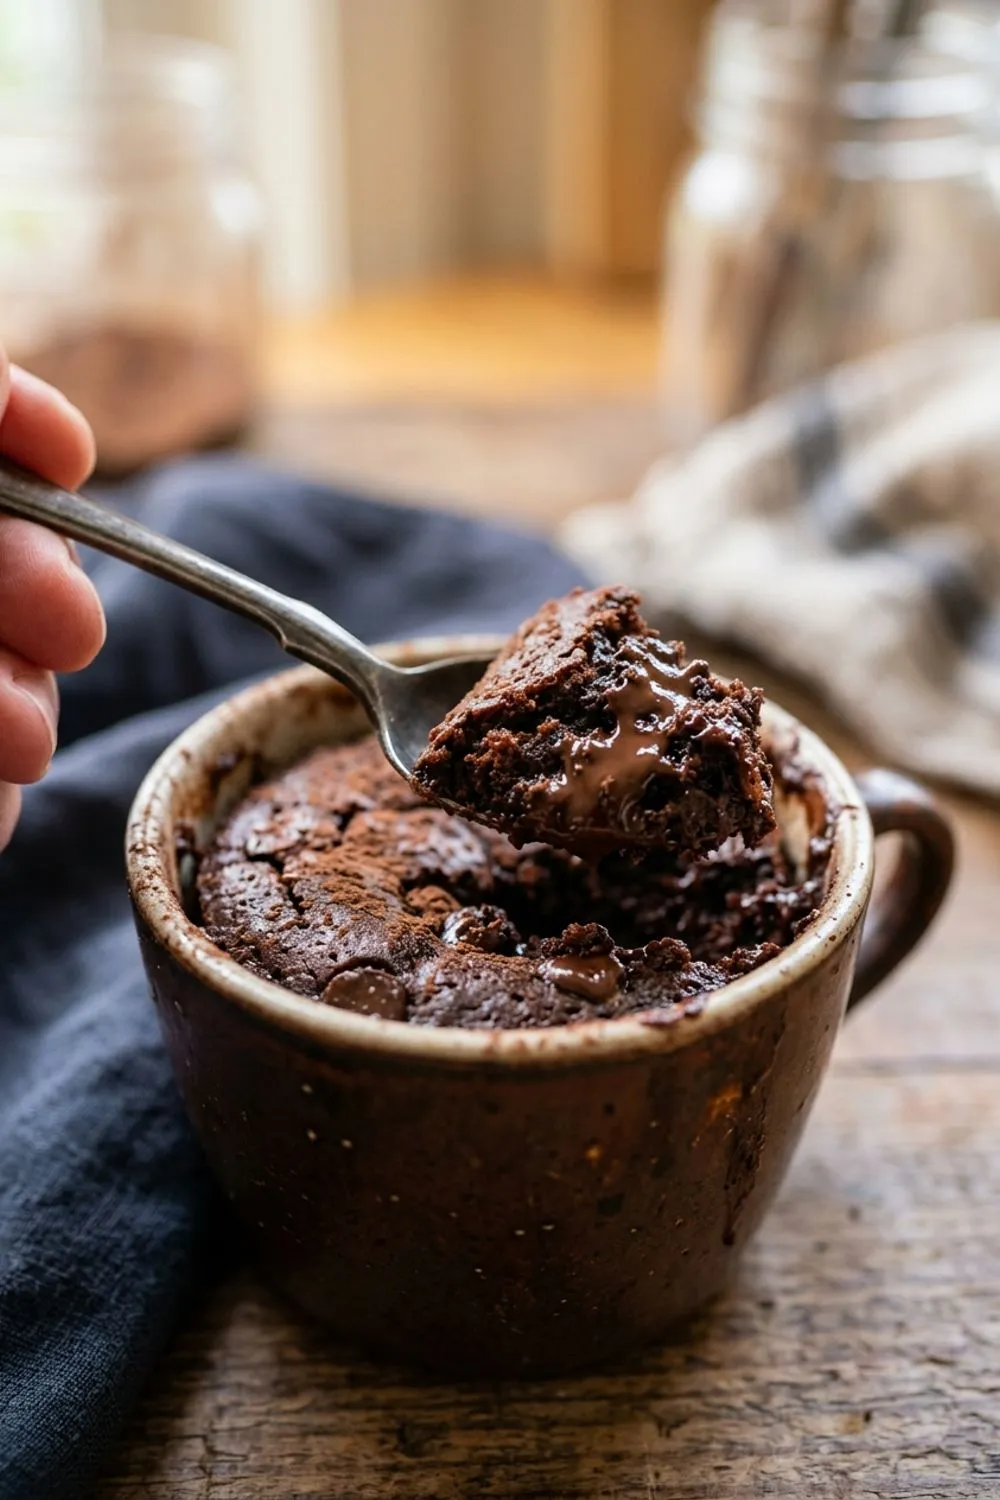
The texture is different from oven-baked brownies. There is no crackly top. There is no crisp edge. What you get instead is an intensely fudgy, almost truffle-like interior with melted chocolate chip pockets scattered throughout. It is softer and denser than an oven brownie, more like a warm chocolate slab than a traditional square. And served warm with a scoop of ice cream, it is absolutely heavenly.
Getting the Batter Right
The key to great microwave brownies is starting with a batter that is slightly different from what you would use for oven baking. In the oven, brownies have twenty to thirty minutes to slowly develop structure and lose moisture. In the microwave, they cook in under three minutes. That means you need less flour (so the brownies do not turn cakey), more fat (so they stay moist despite the rapid cooking), and a higher ratio of sugar and cocoa (to create that dense, fudgy texture).
Melting the butter first and mixing everything in one bowl is part of the beauty of this recipe. There is no creaming step, no alternating wet and dry ingredients, no careful folding technique. You melt the butter, dump in everything else, stir it together, and pour it into a dish. The total mixing time is about two minutes, and the only way to mess it up is to overmix — which is hard to do when there is so little flour involved.
The egg is important here. Unlike my mug cake recipe, which skips the egg entirely, these brownies need it. The egg provides structure that prevents the brownie from collapsing into a puddle when it cools, and it contributes to that fudgy chew that makes brownies different from chocolate cake. Beat the egg in thoroughly until you do not see any streaks of yolk.
The chocolate chips are not just a nice addition — they are essential to the texture. As the brownie cools, the melted chips re-solidify into pockets of solid chocolate dispersed throughout the soft brownie matrix. This gives you those little bursts of extra chocolate richness in every bite that make the brownie feel more indulgent than its simple ingredient list would suggest.
Choosing the Right Dish
The container you microwave in has a bigger impact on the result than you might expect. I have tested this recipe in mugs, ramekins, small bowls, glass pie plates, and various plastic containers. The best results come from a wide, shallow microwave-safe dish — something about five to six inches across and two to three inches deep.
A wide dish allows the batter to spread into a thinner layer, which cooks more evenly and gives you a better ratio of surface area to interior. A deep, narrow container concentrates the batter into a thick mass that takes longer to cook through, increasing the risk of overcooked edges and a gooey, undercooked center.
Glass and ceramic dishes work better than plastic because they retain heat, which helps the brownie continue cooking gently after you stop the microwave. This carryover cooking is essential — it is what firms up the center without drying out the edges.
Grease the dish well. Microwave brownies are stickier than their oven-baked counterparts, and they will cling to an ungreased surface. A light spray of nonstick cooking spray or a thin coating of butter works perfectly.
The Critical Timing
If there is one thing I want you to take away from this recipe, it is this: less time in the microwave is always better than more. You can always put a brownie back in for ten more seconds. You cannot un-cook an overcooked brownie.
Start checking at two minutes and fifteen seconds. The edges should look set and slightly pulled away from the dish. The center will look glossy and slightly wet — this is correct and desirable. If the center is still liquid and sloshy, give it another fifteen seconds and check again.
The moment the surface looks set but moist, stop. Remove the dish from the microwave and let it sit. Over the next five to seven minutes, the residual heat in the dish will gently finish cooking the center. When you cut into the brownie after this resting period, it should be fudgy and dense, not gooey or raw.
Microwaves vary enormously in power. A 700-watt microwave will need the full three minutes or slightly more. A 1200-watt microwave might be done at two minutes flat. The first time you make this recipe, hover near the microwave and check frequently. Once you know the exact timing for your machine, you will nail it every time.
Serving Suggestions That Elevate the Experience
Microwave brownies are at their absolute best served warm, about five to seven minutes after cooking. This is when the texture is most appealing — soft and fudgy throughout, with the chocolate chips still partially melted.
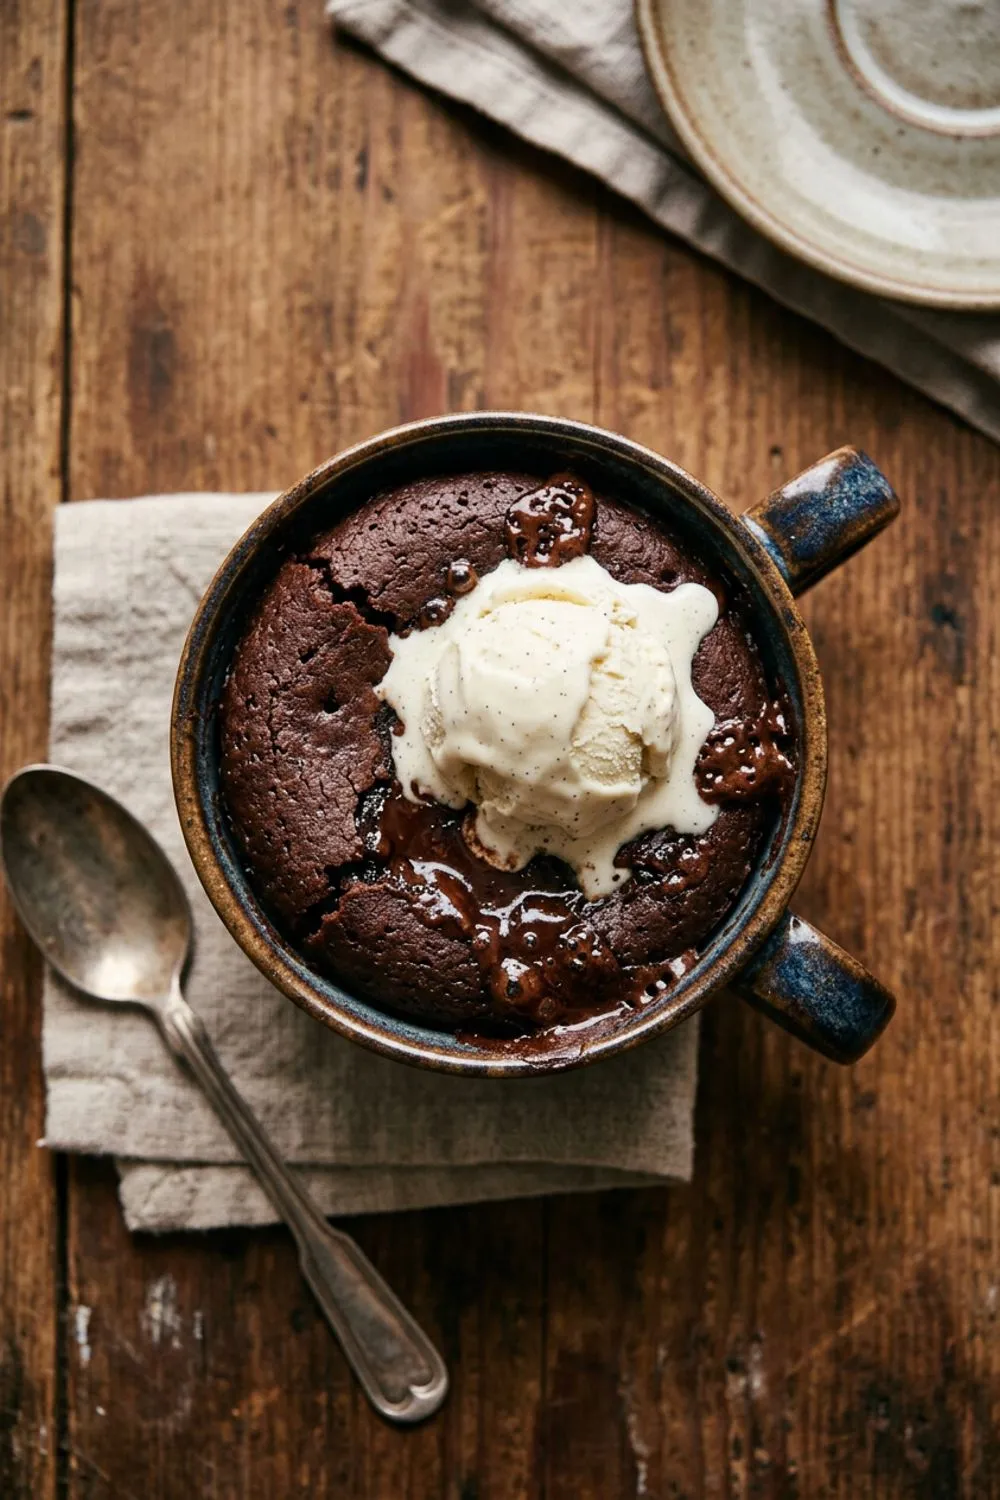
A la mode: A scoop of vanilla ice cream on top of a warm brownie square is the classic for a reason. The cold ice cream melts into the warm brownie, creating a pool of chocolate and vanilla that is criminally good.
With whipped cream and berries: A dollop of whipped cream and a handful of fresh raspberries transforms a humble microwave brownie into something that looks and tastes like it belongs on a restaurant dessert menu.
Peanut butter drizzle: Warm a tablespoon of peanut butter in the microwave for ten seconds and drizzle it over the brownie. The salty-sweet combination with the chocolate is addictive.
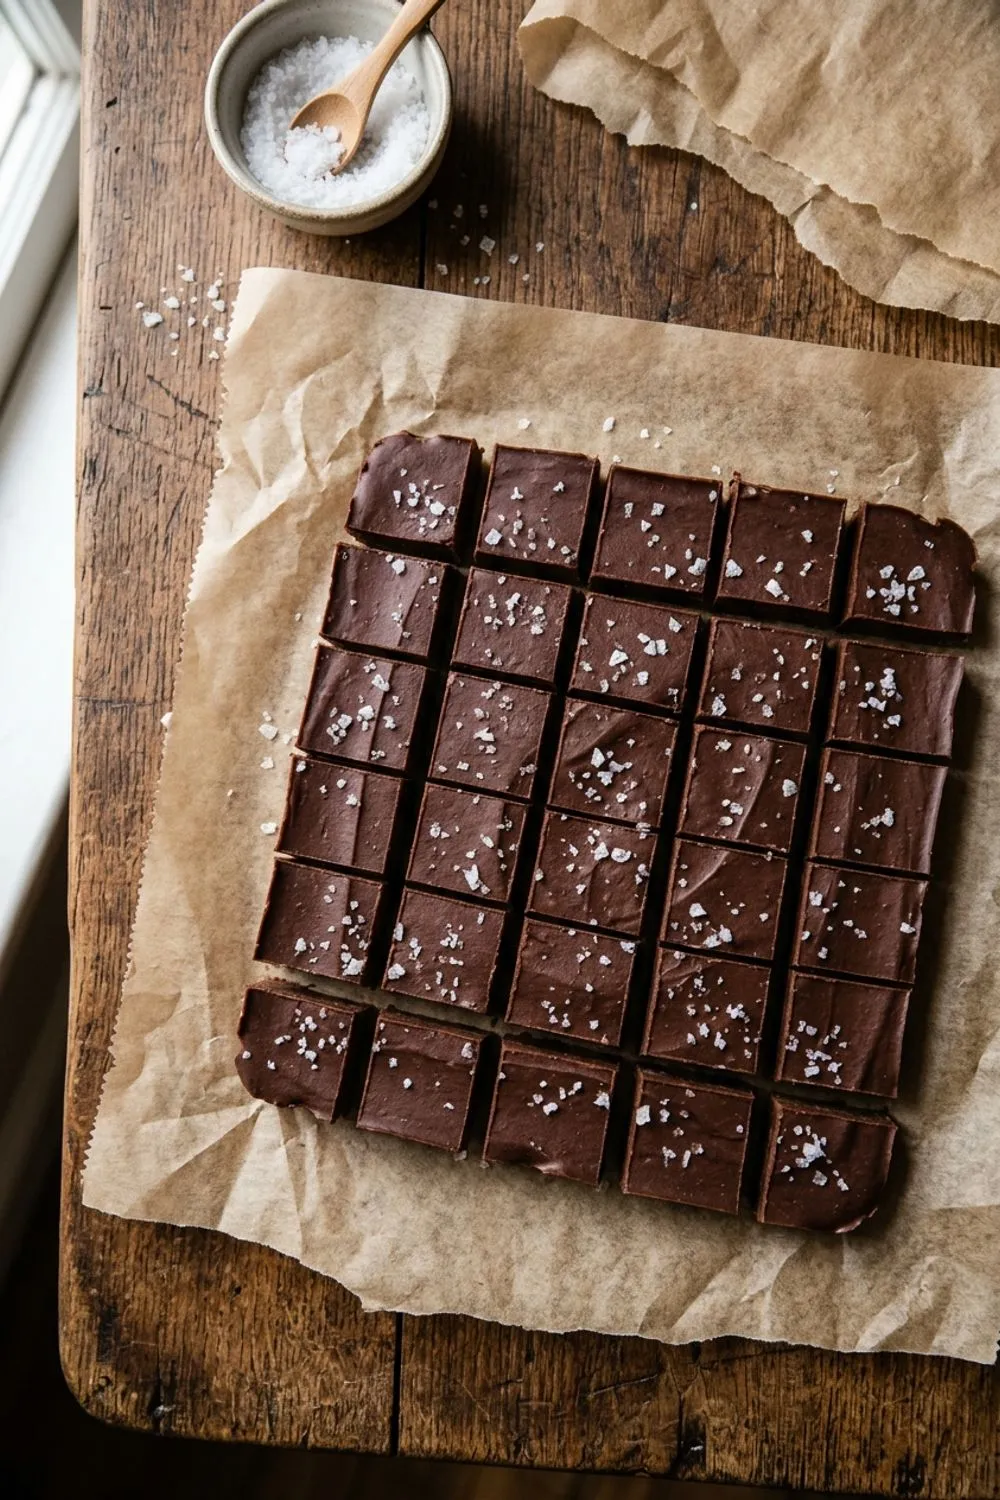
Caramel and sea salt: A drizzle of caramel sauce and a pinch of flaky sea salt turns these into salted caramel brownies. Store-bought caramel works perfectly here.
Crumbled in a parfait: Break the brownie into chunks and layer with whipped cream and chocolate sauce in a glass for an easy, elegant parfait.
Variations to Try
Double chocolate: Increase the cocoa powder to a quarter cup and use dark chocolate chips. The result is almost impossibly chocolatey.
Peanut butter brownies: Swirl a tablespoon of peanut butter into the top of the batter before microwaving. The peanut butter creates gorgeous marbled ribbons through the brownie.
Espresso brownies: Add half a teaspoon of instant espresso powder to the batter. It deepens the chocolate flavor without adding a noticeable coffee taste.
S’mores brownies: Replace the chocolate chips with a mix of mini marshmallows and broken graham cracker pieces. The marshmallows melt into gooey pockets — it is like a s’more and a brownie had a baby.
Mint brownies: Add a quarter teaspoon of peppermint extract to the batter and use mint chocolate chips. These taste like a Thin Mint in brownie form.
Making Multiple Servings
This recipe makes four small brownie squares, which is perfect for one or two people. If you need more, you have two options.
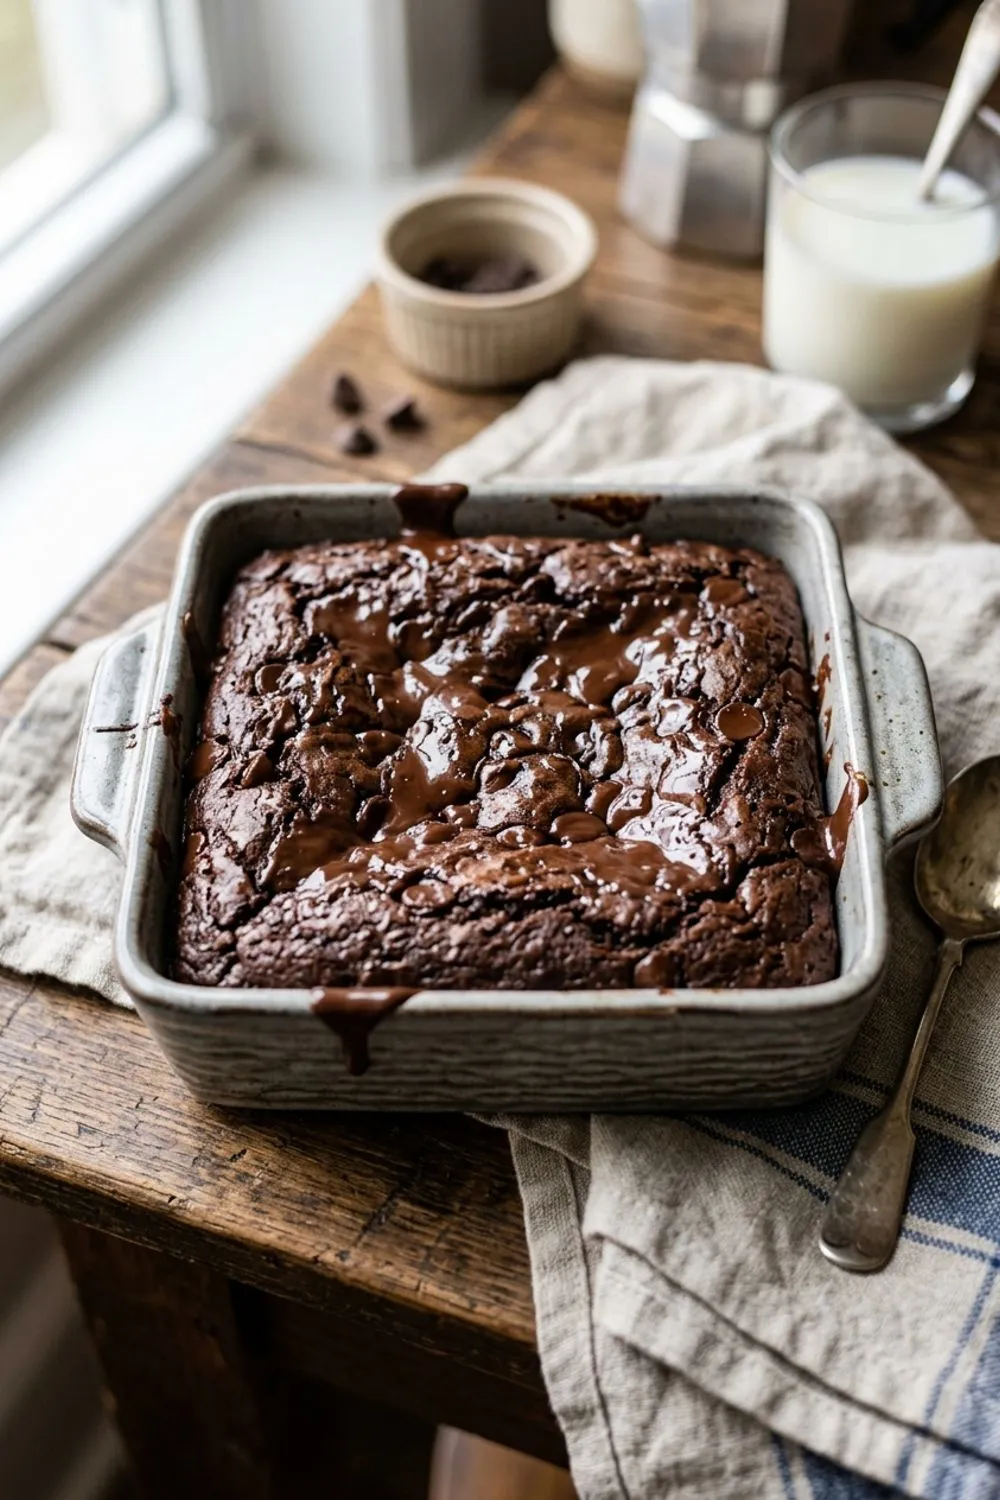
The first is to double the recipe and use a larger dish — a standard glass pie plate works well. Increase the microwave time to about four to five minutes, checking frequently. The larger volume takes longer to cook through.
The second option, which I actually prefer, is to make two separate batches. Each batch takes about five minutes from start to finish, so you can have eight brownies ready in ten minutes. Making separate batches gives you more control over the cooking and ensures even results.
If you are feeding a crowd and have access to an oven, I would honestly recommend switching to my double chocolate brownies recipe instead. Oven-baked brownies scale up much more easily and give you that crispy top that is hard to achieve in the microwave. But for four people or fewer, these microwave brownies are the fastest, easiest path to chocolate satisfaction.
Troubleshooting Microwave Brownies
Brownies are rubbery or tough: This is the most common issue and it always comes down to overcooking. Microwaves cook fast and aggressively, and even fifteen extra seconds can transform a fudgy brownie into something that bounces. Next time, reduce your cooking time by twenty to thirty seconds and let the residual heat do the final cooking during the resting period.
Brownies are raw in the middle: Your microwave may be lower-powered than average, or your dish is too deep. Try spreading the batter thinner in a wider dish, or increase the cooking time in ten-second increments. Remember that the center should look slightly moist when you stop the microwave — it firms up during the resting period.
Brownies taste eggy: Make sure you are using a large egg, not an extra-large. Too much egg relative to the other ingredients creates an eggy flavor and a spongier texture. If you are sensitive to this, try using just the egg yolk instead of the whole egg for an even fudgier, richer result.
Brownies are dry or crumbly: The butter-to-flour ratio is off, or the brownies were overcooked. Use a full four tablespoons of butter and only a quarter cup of flour. These brownies should be wet and fudgy, not dry and cakey. Think of them as closer to a truffle than a cake.
The brownie stuck to the dish: Grease more generously next time. I use a nonstick spray rather than butter because butter can create hot spots in the microwave. If the brownie is stuck, run a knife around the edges and let it cool completely before trying to remove it — warm brownies are much stickier than cool ones.
The Perfect Occasions for Microwave Brownies
I find myself making these brownies in very specific situations, and knowing when they shine helps set the right expectations. They are perfect for weeknight desserts when you want something homemade but do not have the energy for a full baking project. They are ideal for dorm rooms, hotel rooms, or vacation rentals where you have a microwave but not an oven. They are great for kids who want to help make dessert but need a recipe simple enough to handle mostly on their own.
They are also my go-to when unexpected guests arrive and I want to offer something sweet. Most people do not have the ingredients for a full dessert on hand at any given moment, but butter, sugar, cocoa, an egg, and flour are pantry basics that are almost always available. Within fifteen minutes of someone walking through my door, I can have warm brownies on a plate, and that kind of hospitality never fails to make an impression.
I have also found that these are perfect for small weeknight dinner parties. When everyone has finished the main course and someone mentions dessert, I can excuse myself to the kitchen and return five minutes later with warm brownies and a tub of ice cream. People are always impressed by how quickly dessert appeared, and I never tell them it was microwaved unless they ask.
Where I would not recommend microwave brownies is for bake sales, potlucks, or any situation where the brownies need to sit out at room temperature for more than an hour or two. They are best enjoyed fresh and warm, and they do not have the structural integrity of oven-baked brownies for transport and display. For those occasions, reach for a proper baked recipe instead.
How to Store Microwave Brownies
Room temperature: Store in an airtight container for up to two days. They are best eaten the same day.
Refrigerator: Wrap tightly and refrigerate for up to four days. Microwave individual squares for 10 to 15 seconds to restore the warm, fudgy texture.
Freezer: Wrap squares individually in plastic wrap and freeze for up to one month. Thaw at room temperature for 30 minutes or microwave for 20 to 30 seconds.
Honestly, these brownies rarely make it to storage in my house. They appear, they are consumed, and the dish is in the dishwasher before anyone thinks to save a piece for later. And that, I think, is the highest compliment a recipe can earn — being too good to save for tomorrow. For more quick chocolate fixes, check out my mug cake or my two-ingredient fudge.
Never Miss a Sweet Recipe
Join 5,000+ home bakers and get new recipes straight to your inbox.
Ingredients
Instructions
- 1
Melt the Butter
Place the butter in a microwave-safe bowl or small dish (a wide, shallow microwave-safe container works best). Microwave for 30-45 seconds until completely melted.
- 2
Mix the Batter
Add the sugar and cocoa powder to the melted butter and whisk until smooth. Add the egg and vanilla, whisking until well combined. Fold in the flour and salt until just incorporated — do not overmix. Stir in the chocolate chips.
- 3
Transfer to Dish
Pour the batter into a greased microwave-safe dish (a small round or square container, approximately 5-6 inches across). Spread evenly with a spatula.
- 4
Microwave
Microwave on high for 2 minutes 30 seconds to 3 minutes. The brownie is done when the edges are set and the center looks slightly moist but not liquid. It will continue to firm up as it cools. Start checking at 2 minutes 15 seconds.
- 5
Cool and Cut
Let the brownie cool in the dish for 5-7 minutes. The residual heat will finish cooking the center. Run a knife around the edges, invert onto a cutting board or plate, and cut into 4 squares. Serve warm or at room temperature.
Nutrition Information
Per serving (serves 4). Values are approximate.
| Calories | 290 calories |
| Total Fat | 15g |
| Saturated Fat | 9g |
| Carbohydrates | 37g |
| Sugar | 28g |
| Protein | 3.5g |
| Sodium | 85mg |
| Fiber | 1.5g |
* Percent Daily Values are based on a 2,000 calorie diet. Your daily values may be higher or lower depending on your calorie needs. Nutritional information is an estimate and may vary.
Frequently Asked Questions
Can I make these in a mug instead?
Yes! Divide the batter between two large mugs and microwave each for about 1 minute 30 seconds. You get individual brownie portions with a softer, more cake-like texture.
Why are my microwave brownies rubbery?
They were microwaved too long. Reduce cooking time by 15-30 seconds. The brownies should look slightly underdone when you stop the microwave — they firm up significantly as they cool.
Can I add nuts to these brownies?
Absolutely! Fold in 2-3 tablespoons of chopped walnuts or pecans with the chocolate chips. They will not get toasty in the microwave, so use pre-toasted nuts for the best flavor.
Do microwave brownies taste as good as oven-baked?
They are different but delicious in their own way. Microwave brownies are fudgier and softer, without the crispy top crust you get from oven baking. Think of them as a quick, gooey alternative.

Reader Reviews
Based on 178 reviews