no-bake-chocolate-peanut-butter-bars
No-Bake Chocolate Peanut Butter Bars
Easy no-bake chocolate peanut butter bars with a creamy peanut butter layer and rich chocolate topping. Ready in 30 minutes, no oven needed.
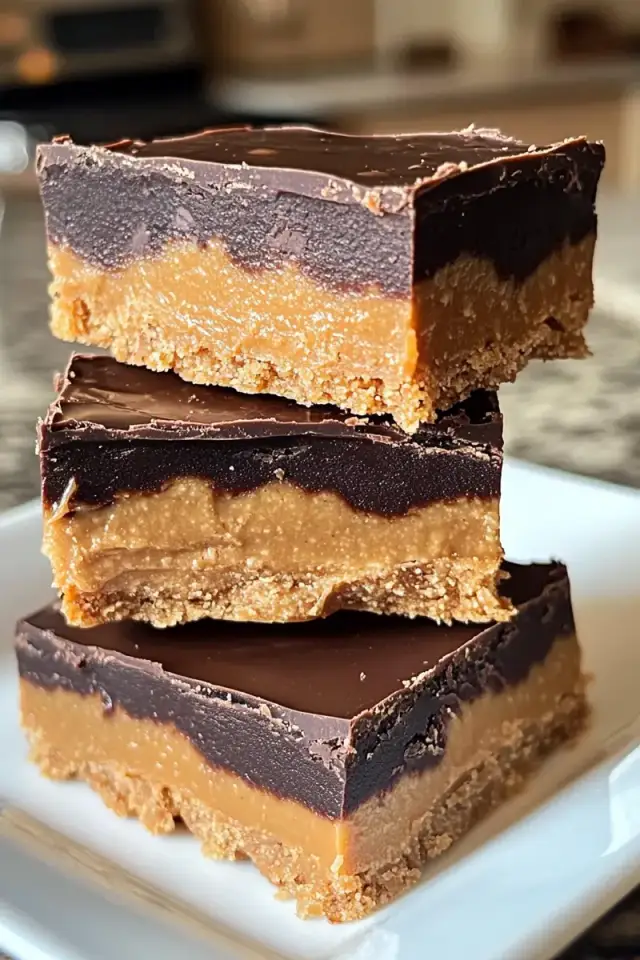
The Five-Minute Miracle That Tastes Like You Spent Hours
I first made these bars on a sweltering summer afternoon when the last thing I wanted to do was turn on my oven. What started as a quick fix became my go-to dessert for potlucks, lunchboxes, and those moments when someone’s craving chocolate and peanut butter but you’re short on time. These no-bake bars deliver that perfect balance of creamy and rich—no baking required, just a little patience for the chill time.
Baker’s Tips
- Use room-temperature peanut butter and butter for the filling. Cold ingredients are harder to mix smoothly and may create lumps in your final bars.
- Don’t skip the parchment paper overhang. It makes lifting the entire block out of the pan effortless, and you’ll get cleaner edges when cutting.
- If your chocolate topping cracks when you cut, your pan is too cold. Let the bars sit at room temperature for 5 minutes before cutting, or use the hot knife trick.
- For thicker bars, use a 6x6-inch pan instead of 8x8. You’ll get fewer bars but they’ll be taller and more indulgent.
Variations
- Salted Caramel Drizzle: Drizzle melted caramel sauce over the chocolate layer before it sets, then sprinkle with fleur de sel for a sweet-salty contrast.
- Dark Chocolate & Almond: Replace the semi-sweet chocolate with dark chocolate chips and swap the peanut butter for almond butter for a deeper, more sophisticated flavor.
- Crunchy Peanut Butter: Use crunchy peanut butter instead of creamy for extra texture and a more pronounced peanut flavor throughout the bars.
If you love the no-bake approach, you’ll also enjoy my No-Bake Chocolate Peanut Butter Cups for bite-sized indulgence.
Ingredients
For the Peanut Butter Layer
For the Chocolate Topping
Instructions
- 1
Line Your Pan
Line an 8x8-inch baking pan with parchment paper, leaving some overhang for easy removal. This prevents sticking and makes cleanup simple.
- 2
Cream the Peanut Butter Mixture
In a medium bowl, beat together peanut butter and softened butter until smooth and well combined, about 1-2 minutes.
- 3
Mix in Dry Ingredients
Add powdered sugar, vanilla extract, and salt to the peanut butter mixture. Stir until you have a thick, spreadable dough with no lumps.
- 4
Press into Pan
Press the peanut butter mixture firmly and evenly into the prepared pan. Use the bottom of a measuring cup or your hands to create an even layer.
- 5
Melt the Chocolate
In a microwave-safe bowl, combine chocolate chips and coconut oil. Microwave in 30-second intervals, stirring between each, until completely melted and smooth.
- 6
Spread Chocolate Layer
Pour the melted chocolate over the peanut butter layer and spread evenly with a spatula, making sure to cover all edges.
- 7
Chill Until Set
Refrigerate for at least 10 minutes until the chocolate is completely firm. For easier cutting, chill for 20-30 minutes.
- 8
Cut and Serve
Lift the bars out using the parchment overhang and cut into 24 squares. Store in an airtight container in the refrigerator for up to one week.
Nutrition Information
Per serving (serves 24). Values are approximate.
| Calories | 185 calories |
| Total Fat | 12g |
| Saturated Fat | 6g |
| Carbohydrates | 19g |
| Sugar | 14g |
| Protein | 4g |
| Sodium | 95mg |
| Fiber | 1g |
* Percent Daily Values are based on a 2,000 calorie diet. Your daily values may be higher or lower depending on your calorie needs. Nutritional information is an estimate and may vary.
Never Miss a Sweet Recipe
Join 5,000+ home bakers and get new recipes straight to your inbox.
Frequently Asked Questions
Can I use natural peanut butter instead of creamy?
Yes, but natural peanut butter (the kind with separated oil) works best if you stir it well before measuring. If it's too oily, drain some of the oil off first. The bars may be slightly softer, so chill them a bit longer.
How do I get clean cuts without the chocolate cracking?
Let the bars chill for at least 20-30 minutes so the chocolate is completely set. Use a sharp knife dipped in hot water and wiped clean between each cut. This helps the blade glide through smoothly.
Can I make these ahead and freeze them?
Absolutely! These freeze beautifully for up to 2 months in an airtight container. Let them thaw in the refrigerator for about 30 minutes before serving. They're even easier to cut straight from the freezer.

Reader Reviews
Based on 446 reviews