No-Bake Desserts
Salted Quinoa Granola Bars
No-bake salted quinoa granola bars with crispy texture and wholesome ingredients. Perfect for meal prep and snacking.
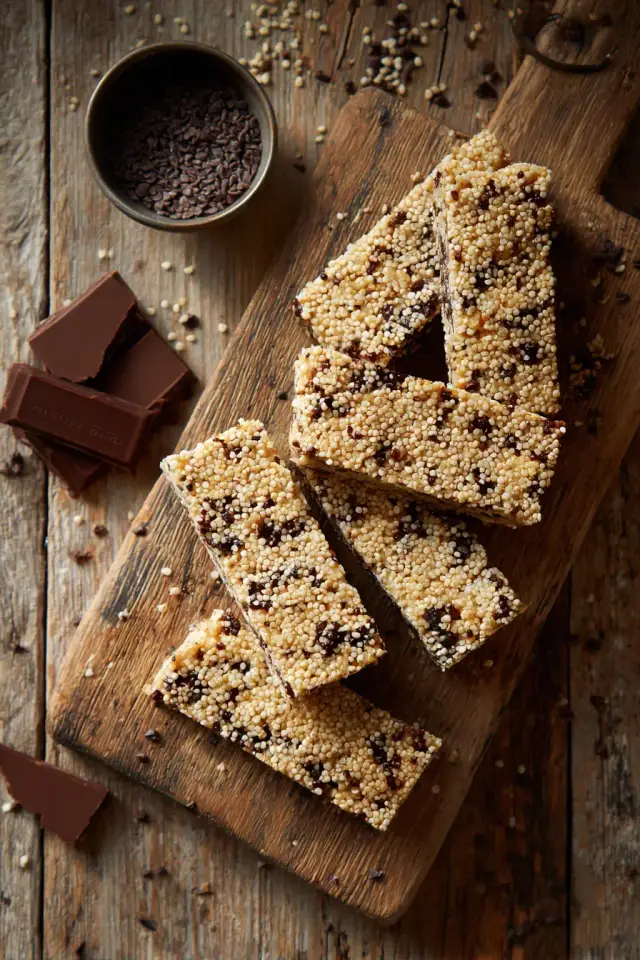
Skip the Oven, Skip the Stress
Tired of granola bars that either crumble to pieces or taste like cardboard? These salted quinoa granola bars deliver crispy texture with actual flavor—and they require zero baking. Just mix, press, chill, and cut.
Quick Tips
- Warm your wet ingredients slightly so they distribute evenly and help bind everything together, but don’t let them get hot or you’ll cook the coconoa flakes.
- Use a damp spatula or damp hands to press the mixture into the pan—it prevents sticking and gives you better control for even bars.
- For the cleanest cuts, use a sharp chef’s knife and wipe it with a damp cloth between each slice to avoid dragging sticky bits.
- Make a double batch and freeze half in an airtight container for up to 3 months—perfect for unexpected snack emergencies.
Variations
- Chocolate Drizzle Version: Melt ¼ cup dark chocolate with 1 teaspoon coconut oil and drizzle over the chilled bars before cutting for an extra indulgent touch.
- Dried Fruit & Spice Twist: Replace half the sunflower seeds with dried cranberries or chopped dried apricots, and add ½ teaspoon cinnamon plus a pinch of cayenne to the dry mixture for warmth and tang.
If you love these bars, you’ll also enjoy my no-bake peanut butter energy bites for another quick protein-packed snack.
Ingredients
Base
Mix-ins & Topping
Instructions
- 1
Prepare Your Pan
Line an 8x8-inch baking pan with parchment paper, leaving a slight overhang on two sides for easy removal.
- 2
Combine Wet Ingredients
In a medium saucepan over low heat, gently warm the almond butter, maple syrup, and coconut oil together, stirring until smooth and fully combined. Remove from heat.
- 3
Mix Dry Ingredients
In a large bowl, combine oats, cooled quinoa, almonds, coconut flakes, sunflower seeds, and 1 teaspoon of salt. Stir well.
- 4
Bring It Together
Pour the warm wet mixture into the dry ingredients and fold gently with a spatula until everything is evenly coated and the mixture holds together.
- 5
Press Into Pan
Transfer the mixture to your prepared pan and press firmly with the back of a spatula or your hands (lightly dampened works best) until compact and even.
- 6
Add Finishing Touches
Sprinkle the remaining ½ teaspoon of salt over the top, pressing gently. If using chocolate chips, scatter them across the surface now.
- 7
Chill & Cut
Refrigerate for at least 2 hours until firm. Lift from pan using parchment overhang and cut into 12 equal bars with a sharp knife (wipe between cuts for clean edges).
Nutrition Information
Per serving (serves 12). Values are approximate.
| Calories | 185 calories |
| Total Fat | 12g |
| Saturated Fat | 3g |
| Carbohydrates | 18g |
| Sugar | 9g |
| Protein | 5g |
| Sodium | 245mg |
| Fiber | 3g |
* Percent Daily Values are based on a 2,000 calorie diet. Your daily values may be higher or lower depending on your calorie needs. Nutritional information is an estimate and may vary.
Never Miss a Sweet Recipe
Join 5,000+ home bakers and get new recipes straight to your inbox.
Frequently Asked Questions
Can I use store-bought cooked quinoa?
Absolutely! Frozen cooked quinoa works perfectly and saves time. Just thaw and cool it completely before adding to your mixture so it doesn't melt the coconut oil.
How long do these bars stay fresh?
Store them in an airtight container in the refrigerator for up to 10 days, or freeze for up to 3 months. They're perfect for grab-and-go breakfasts throughout the week.
What if my bars are too crumbly?
This usually means the wet ingredients weren't warm enough or you didn't press firmly enough. Next time, ensure your nut butter mixture is still slightly warm when mixing, and really compress the mixture into the pan with steady pressure.

Reader Reviews
Based on 455 reviews