Quick & Easy
2-Ingredient Fudge
Why You’ll Love This 2-Ingredient Fudge
I need to tell you about the recipe that changed my entire approach to holiday candy-making. For years, I made traditional cooked fudge — the kind that requires a candy thermometer, precise temperature control, and nerves of steel as you wait for the mixture to hit exactly 238 degrees Fahrenheit. Sometimes it turned out beautifully. Other times it was grainy, or too soft, or so hard it could chip a tooth. Traditional fudge is delicious when it works, but the margin for error is razor-thin.
Then a friend told me about two-ingredient fudge, and I laughed. Two ingredients? Real fudge? That cannot possibly work. But I tried it anyway, mostly out of curiosity, and when I tasted the result I had to sit down for a moment. It was smooth, rich, melt-in-your-mouth chocolate fudge that was every bit as satisfying as the thermometer version — and it took five minutes of actual effort.
The secret is sweetened condensed milk. That thick, golden, impossibly sweet canned milk does all the heavy lifting that sugar, butter, and temperature control do in traditional fudge. When you combine it with melted chocolate chips, you get a mixture that sets into perfect fudge texture without any of the fuss. No thermometer. No soft-ball stage. No panicking about crystallization. Just melt, stir, pour, and chill.
I have made this fudge dozens of times since that first batch, and it has never failed me. Not once. It is the recipe I reach for when I need a quick dessert for a party, a last-minute holiday gift, or just a simple chocolate treat to keep in the fridge for the week. And every single time I serve it, someone asks for the recipe — and then does not believe me when I tell them it is only two ingredients.
Choosing Your Chocolate
The chocolate chips you use will determine the character of your fudge, so this is worth thinking about for a moment. Semisweet chocolate chips are my default choice because they produce a fudge with a balanced sweetness and a strong chocolate presence. The slight bitterness of semisweet chocolate is tempered by the sweetness of the condensed milk, and the result is a fudge that tastes rich without being cloying.
Milk chocolate chips make a sweeter, creamier, milder fudge that kids tend to prefer. If you go this route, I would strongly recommend the sea salt topping to provide a little contrast — otherwise, the fudge can taste one-dimensionally sweet.
Dark chocolate chips — anything in the 60 to 70 percent cacao range — make a more sophisticated, intensely chocolatey fudge that is wonderful for adults and chocolate purists. The bitterness of the dark chocolate is balanced beautifully by the condensed milk, and the resulting fudge has a complexity that semisweet cannot quite match.
You can even mix chocolate types. One of my favorite combinations is half semisweet and half dark chocolate chips, which gives you depth without intensity. Another great option is using white chocolate chips for a completely different but equally delicious fudge — creamy, vanilla-rich, and gorgeous.
Whatever chocolate you choose, I recommend using chips or baking wafers rather than chopping a chocolate bar. Chips are designed to melt evenly, and their uniform size means they heat at the same rate. Chopped chocolate can have pieces of different sizes that melt at different speeds, which increases the risk of overheating some of the chocolate while waiting for the rest to melt.
The Melting Process
This is where the only real skill in the recipe comes into play. Melting chocolate and condensed milk together requires patience and gentle heat. The microwave method is the fastest and most reliable approach, but you need to follow the interval-and-stir method carefully.
Combine the chocolate chips and condensed milk in a medium microwave-safe bowl. Microwave for 30 seconds, then remove and stir thoroughly. The chocolate will not look melted yet, and that is fine. Put it back in and microwave for another 30 seconds. Stir again. Keep repeating this process until the chocolate is fully melted and the mixture is smooth and glossy.
The total time is usually about two to three minutes, depending on your microwave’s power. The critical thing is to stir well between each interval. A lot of the melting happens from the residual heat while you stir, not from the microwave itself. If you skip the stirring and just let the microwave run for two minutes straight, you will almost certainly overheat the chocolate, which will cause it to seize into a grainy, lumpy mess that cannot be fixed.
If you prefer the stovetop method, combine the chips and condensed milk in a saucepan over very low heat. Stir constantly with a rubber spatula until everything is melted and smooth. This takes longer — about five to seven minutes — but gives you more visual control over the process. The key is keeping the heat very low. If the mixture starts to bubble or steam, the heat is too high.
Getting the Texture Right
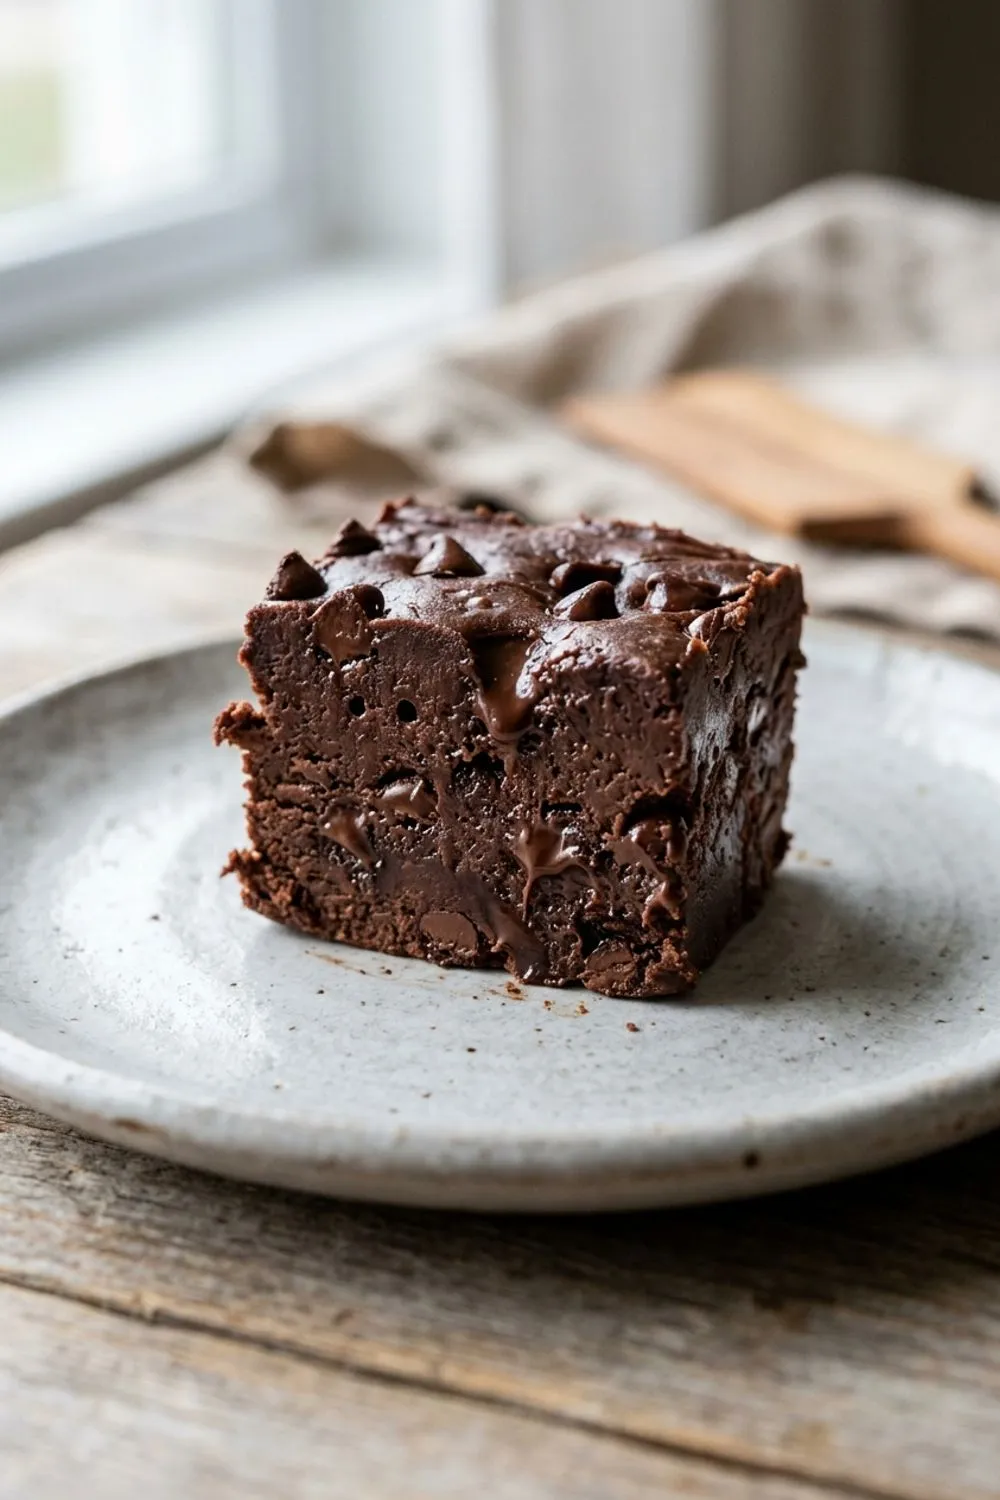
Perfect fudge should be smooth and firm enough to cut into clean squares but soft enough to melt on your tongue. The texture of this fudge depends on two things: how well you melted the chocolate and how long you chilled it.
If the melted mixture has any lumps or grains, the finished fudge will too. Take your time during the melting step and do not stop stirring until the mixture is completely smooth. Run the back of a spoon through it — you should see a glossy, uniform surface with no visible flecks of unmelted chocolate.
Chilling time matters more than you might think. One hour in the refrigerator gives you fudge that is set but still quite soft and almost truffle-like. Two hours gives you a firmer texture that cuts more cleanly and holds its shape at room temperature longer. Overnight chilling produces the firmest, most clean-cutting fudge.
I recommend chilling for at least two hours before cutting, especially if you are making the fudge as a gift or for a party where it needs to look neat. For casual snacking at home, one hour is plenty.
Mix-In Ideas for Every Flavor
The base recipe is perfect on its own, but it is also an incredible canvas for add-ins. Stir any of the following into the melted mixture before pouring it into the pan:
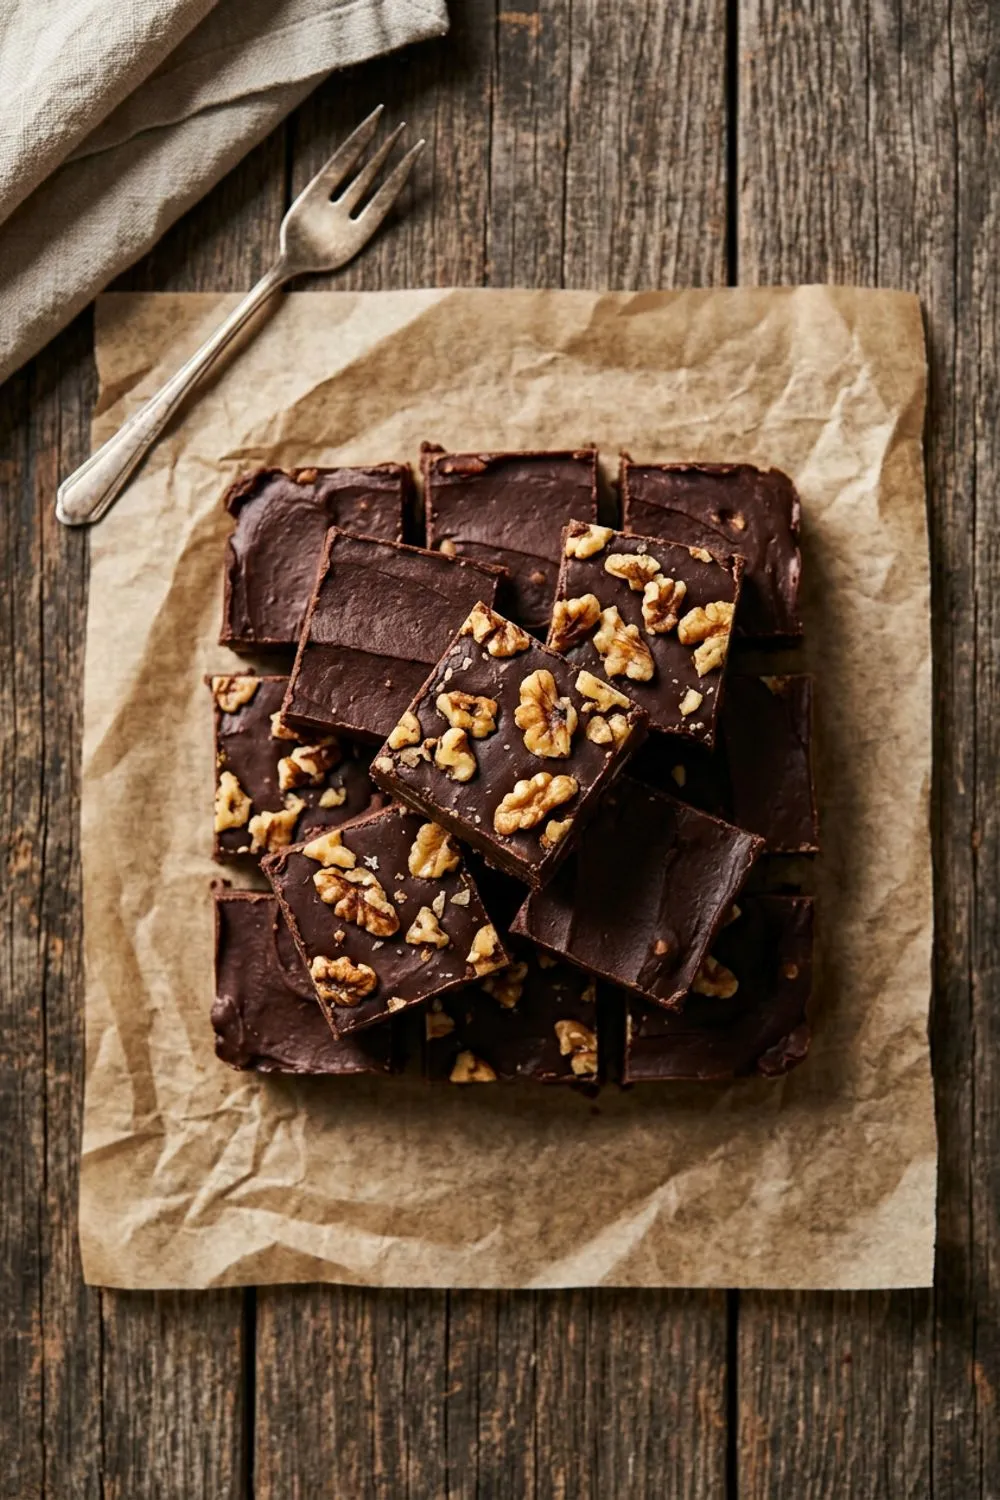
Nuts: Half a cup of chopped toasted walnuts, pecans, or almonds adds crunch and makes the fudge feel more substantial. Toast the nuts first for the best flavor — raw nuts can taste bland in candy.
Peanut butter swirl: Drop tablespoons of creamy peanut butter onto the surface of the poured fudge and swirl with a knife for a marbled peanut butter chocolate effect. Do not mix it in completely — you want distinct swirls.
Dried fruit: Chopped dried cherries, cranberries, or apricots add chewy bursts of tart sweetness that contrast beautifully with the rich chocolate. Cranberries are especially nice for holiday fudge.
Espresso powder: One teaspoon of instant espresso powder stirred into the melted mixture amplifies the chocolate flavor without making the fudge taste like coffee. This is my secret weapon for extra-chocolatey fudge.
Mint: Add half a teaspoon of peppermint extract to the melted mixture for mint chocolate fudge that rivals anything you would find in a candy store. Top with crushed candy canes for a holiday version.
Cookie pieces: Crush a handful of Oreos or graham crackers and fold them in for a cookies-and-cream or s’mores-inspired fudge. The cookie pieces add texture and make each bite a little different.
Cutting Perfect Squares
Getting clean, sharp edges on your fudge squares is surprisingly satisfying, and it is easier than you think. The key is a sharp knife and a clean edge. Use a large chef’s knife or a long thin blade. Before each cut, dip the knife in hot water and wipe it dry. The warm blade slides through the firm fudge like butter and leaves a clean, smooth surface.
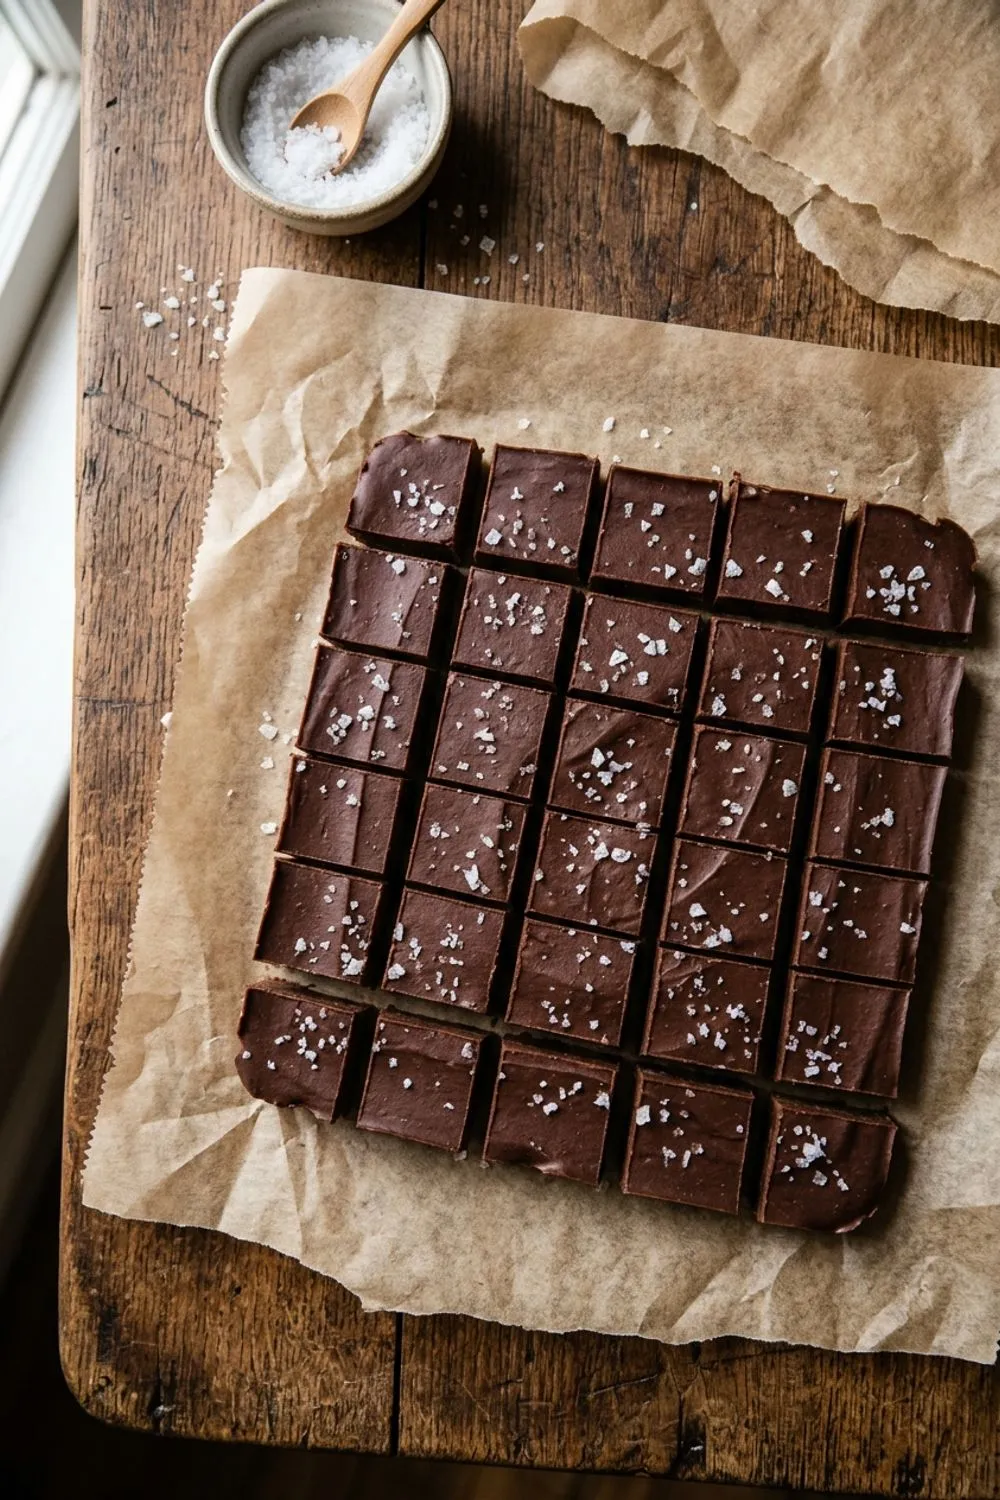
Score the fudge into a grid first with light cuts, then go back and cut all the way through. This gives you even squares without having to eyeball each cut individually. For a standard 8x8 pan, I cut a 6x4 grid for 24 pieces, which gives you squares that are about 1.3 inches on each side — a perfect one or two-bite size.
If you want triangles, cut the fudge into squares first and then cut each square diagonally. For an even more artisanal look, skip the knife entirely and break the fudge into irregular chunks with your hands. These look beautiful piled in a gift bag or on a candy platter.
Packaging Fudge as Gifts
Two-ingredient fudge is one of the best homemade gifts you can make, and not just because it tastes incredible. It is also gorgeous, keeps well, travels easily, and can be customized to suit anyone’s preferences.
For gift giving, I cut the fudge into neat squares, place them in a small candy box or tin lined with wax paper, and tie with a ribbon. A handwritten label listing the ingredients is a thoughtful touch, especially for recipients with allergies.
You can also get creative with the presentation. Stack the squares in a mason jar, layer them between sheets of colored tissue paper in a holiday box, or arrange them on a small slate board wrapped in cellophane. For my chocolate truffles, I use the same presentation tricks — the fudge and truffles look stunning together in a gift box.
Troubleshooting Your Fudge
Fudge is grainy or gritty: The chocolate overheated during melting. Chocolate that gets too hot develops sugar crystals that create a grainy texture. The only way to prevent this is to melt gently in short bursts and stir frequently. Once the fudge is grainy, there is no way to fix it after it sets — but it still tastes fine, so eat it as imperfect fudge and adjust your technique next time.
Fudge is too soft and will not set: It may need more chilling time. Some refrigerators run warmer than others — try moving the pan to the coldest part of your fridge, or place it in the freezer for thirty minutes. If it still will not set after three hours of refrigeration, the chocolate-to-condensed-milk ratio may be off. Next time, add an extra ounce or two of chocolate chips.
Fudge is too hard and difficult to bite: You used too many chocolate chips relative to the condensed milk, or the fudge was chilled for too long. Let it sit at room temperature for ten to fifteen minutes before serving. You can also try reducing the chocolate chips by two tablespoons next time.
Chocolate seized into a lumpy mess: Water got into the chocolate during melting. This can happen from steam, a wet spoon, or condensation on the bowl. If it seizes, immediately add one to two teaspoons of coconut oil or vegetable oil and stir vigorously. This will often smooth it out enough to salvage the batch.
Making Fudge with Kids
This is one of the best recipes for introducing children to candy-making because the entire process is simple and the results are guaranteed. There is no hot sugar syrup to worry about, no candy thermometer to monitor, and no critical timing windows. A child who can stir a spoon can make this fudge with minimal supervision.
I recommend pre-measuring the ingredients and letting kids do the stirring. The microwave steps should be handled by an adult since the bowl gets hot, but the pouring, spreading, and especially the topping-sprinkling steps are perfect for little hands. Kids love pressing candy cane pieces, sprinkles, or mini marshmallows into the top of the fudge — it lets them feel like they are creating something special and personal.
How to Store 2-Ingredient Fudge
Refrigerator: Store in an airtight container between layers of parchment or wax paper. The fudge keeps for up to three weeks in the refrigerator, though I doubt it will last that long.
Room temperature: The fudge can sit out for several hours during a party, but it will become softer and stickier as it warms. In a cool room (below 68 degrees Fahrenheit), it is fine for most of a day.
Freezer: Wrap squares individually in plastic wrap, then place in a freezer bag. Frozen fudge keeps for up to three months. Thaw in the refrigerator overnight.
Why This Recipe Deserves to Be in Everyone’s Repertoire
I have taught this recipe to teenagers, handed it to friends who claim they cannot cook, and shared it with experienced bakers who were skeptical that anything this easy could taste this good. Every single person has had the same reaction: disbelief followed by delight. It is the recipe that proves you do not need complexity to achieve something wonderful.
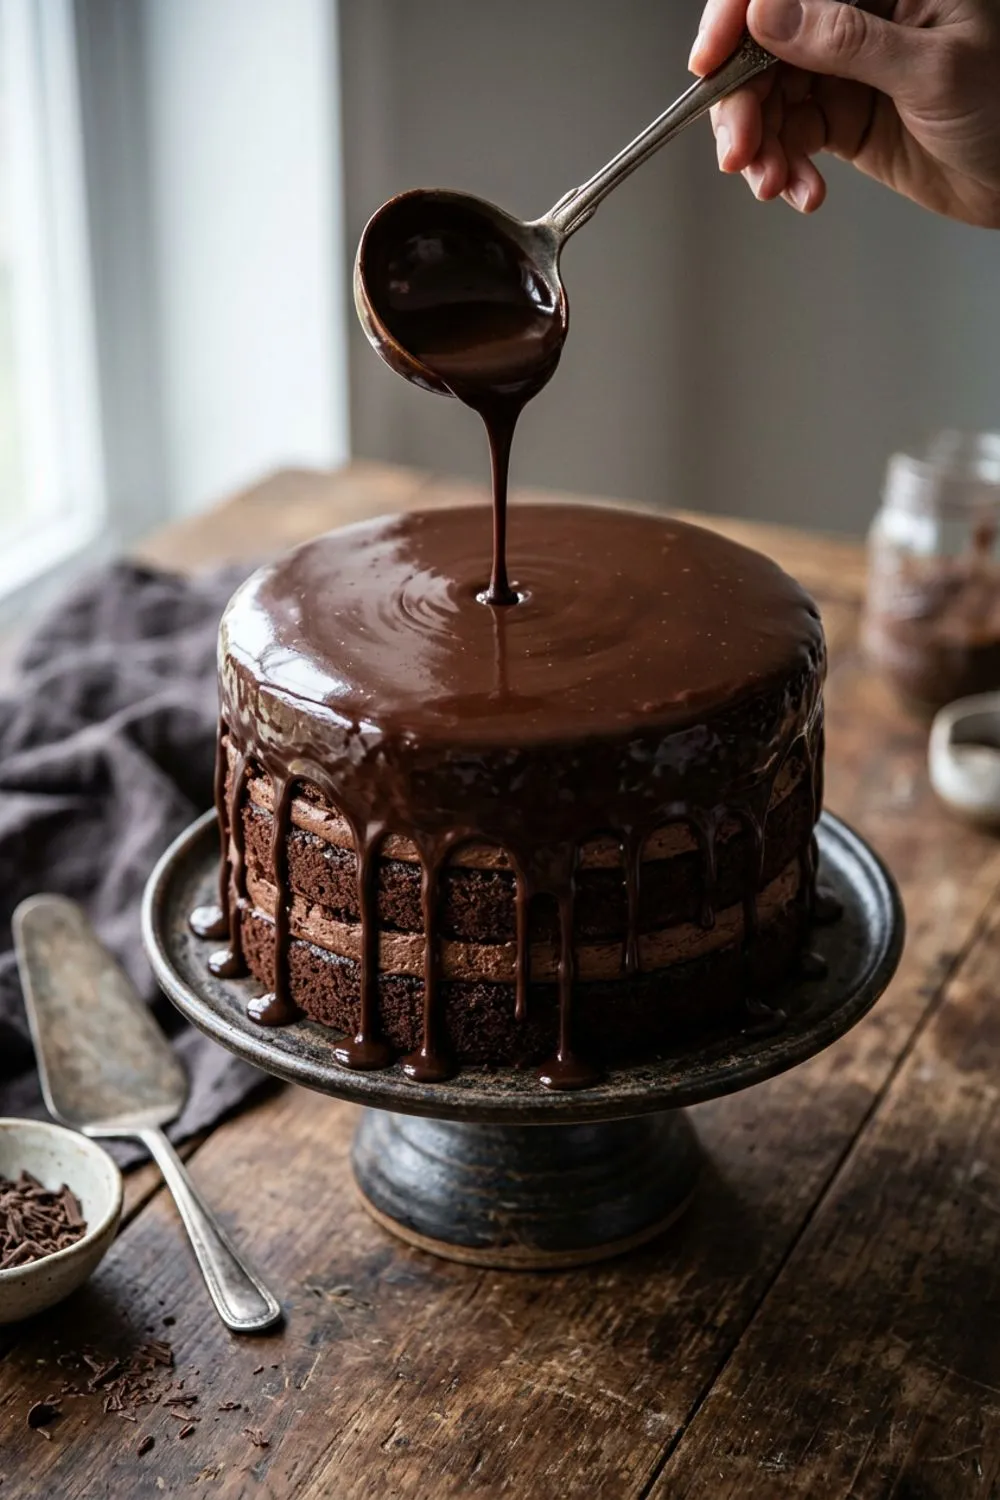
Whether you are making it for yourself on a random Wednesday, preparing it for a holiday cookie exchange, packaging it as a thoughtful homemade gift, or using it to introduce a child to the joy of making candy, this two-ingredient fudge delivers. It is reliable, adaptable, and genuinely delicious. And it takes five minutes. I still cannot quite believe it either. If you enjoy this, try my chocolate ganache which uses a similar technique for an equally indulgent result.
Never Miss a Sweet Recipe
Join 5,000+ home bakers and get new recipes straight to your inbox.
Ingredients
Fudge
Optional Additions
Instructions
- 1
Prepare the Pan
Line an 8x8-inch (20x20cm) baking pan with parchment paper, leaving overhang on two sides for easy removal. Lightly grease the parchment with nonstick spray.
- 2
Melt the Chocolate
Combine the chocolate chips and sweetened condensed milk in a medium microwave-safe bowl. Microwave in 30-second intervals, stirring thoroughly between each, until the chocolate is completely melted and the mixture is smooth (about 2-3 minutes total).
- 3
Add Flavorings
Stir in the vanilla extract if using. The mixture should be thick, glossy, and completely smooth with no visible lumps or streaks.
- 4
Pour and Smooth
Pour the fudge mixture into the prepared pan and spread into an even layer using an offset spatula or the back of a spoon. Tap the pan on the counter a few times to release air bubbles.
- 5
Add Toppings and Chill
Sprinkle with flaky sea salt if desired. Refrigerate for at least 1 hour until completely firm and set. For best results, chill for 2 hours.
- 6
Cut and Serve
Use the parchment overhang to lift the fudge from the pan. Place on a cutting board and cut into 24 squares using a sharp knife. Wipe the knife clean between cuts for the neatest edges.
Nutrition Information
Per serving (serves 24). Values are approximate.
| Calories | 110 calories |
| Total Fat | 5g |
| Saturated Fat | 3g |
| Carbohydrates | 16g |
| Sugar | 14g |
| Protein | 1.5g |
| Sodium | 25mg |
| Fiber | 0.5g |
* Percent Daily Values are based on a 2,000 calorie diet. Your daily values may be higher or lower depending on your calorie needs. Nutritional information is an estimate and may vary.
Frequently Asked Questions
Can I use milk chocolate chips instead of semisweet?
Yes! Milk chocolate makes sweeter, creamier fudge. You can also use dark chocolate chips for a richer, more intense flavor. Any type works with this method.
Why is my fudge grainy?
The chocolate was overheated or not stirred enough. Always melt in short intervals and stir thoroughly between each. If it seizes, add a teaspoon of coconut oil and stir vigorously.
Does this fudge need to be refrigerated?
Yes, store in the refrigerator for the best texture. It can sit at room temperature for a few hours for serving, but it will be softer and stickier than refrigerated fudge.
Can I double this recipe?
Absolutely. Use a 9x13-inch pan instead and double all ingredients. The melting may take slightly longer — add an extra 30-second interval or two.

Reader Reviews
Based on 245 reviews