Cookies & Bars
Lemon Bars
The Perfect Balance of Sweet and Tangy
There is something almost magical about a well-made lemon bar. That first bite where the powdery sweetness hits your lips, followed immediately by a bright, puckering burst of lemon — it stops you in your tracks every single time. I have been making lemon bars for well over a decade, and this recipe is the one I keep coming back to. It is the one that friends request for every picnic, every baby shower, every summer potluck.
What makes these lemon bars special is how simple they are. No obscure ingredients, no complicated techniques, no temperamental custards that require a candy thermometer. You are looking at basic pantry staples — butter, flour, sugar, eggs, lemons — transformed into something that tastes infinitely more impressive than the sum of its parts. The shortbread crust is sandy and rich, and the lemon filling is smooth, silky, and boldly tart without being mouth-puckering.
I have tested versions with cornstarch, versions with condensed milk, versions with cream cheese. And every time, I come back to this classic approach because it just works. The flour-thickened filling sets up perfectly every time, and the balance between the buttery crust and the bright citrus is exactly right. These are lemon bars the way your grandmother made them, only maybe just a little bit better.
Why Fresh Lemons Make All the Difference
I know it is tempting to reach for that bottle of lemon juice in the fridge door. It is right there, it is convenient, and it says “lemon juice” on the label. But here is the truth that every baker learns eventually — fresh lemons and bottled juice are two fundamentally different products when it comes to baking.
Fresh lemon juice has a complexity that bottled simply cannot replicate. There are floral, almost herbaceous notes layered underneath the tartness. When you squeeze a fresh lemon, you release aromatic oils from the peel that mingle with the juice and add dimension. Bottled lemon juice, even the good stuff, has been pasteurized and processed in ways that strip out these delicate flavors.
And then there is the zest. The bright yellow outer layer of a lemon is packed with essential oils that carry the most intense lemon flavor you can get. When you stir fresh zest into the filling, those little specks of yellow distribute throughout and create pockets of pure citrus intensity. You cannot get that from a bottle.
For this recipe, you will need about three large lemons. Roll them firmly on the counter before juicing — this breaks the internal membranes and gives you more juice. Zest first, juice second, and make sure you only zest the yellow part. The white pith underneath is bitter and will ruin the flavor of your filling.
Building the Perfect Shortbread Crust
The crust is arguably the most important part of a lemon bar. It needs to be sturdy enough to support a knife cutting through it, tender enough to practically melt in your mouth, and flavorful enough to stand up to the bold lemon filling. This shortbread crust checks every single box.
The key is cold butter. You want the butter cubed small and straight from the refrigerator. When you work it into the flour and powdered sugar, you are creating a mixture that looks like coarse, damp sand. Some recipes call for mixing this in a food processor, which works fine, but I prefer doing it by hand with a pastry cutter or my fingertips. You have more control, and you can feel exactly when the texture is right.
Press the crust firmly into the pan. I mean really firmly — use the flat bottom of a measuring cup or a glass to compact it down. Any areas that are loosely packed will crumble when you try to cut the finished bars. An even, dense crust is what gives you those bakery-perfect slices.
The blind baking step is not optional. Pouring raw filling onto raw dough is a recipe for a soggy, undercooked mess. Baking the crust first sets its structure and creates a barrier between the butter-rich dough and the liquid filling. You want it just lightly golden — not dark brown. It will continue baking when you return it to the oven with the filling.

Getting the Filling Just Right
The filling for these lemon bars is essentially a simple lemon curd that bakes right in the pan. The eggs provide structure, the sugar provides sweetness to balance the tartness, and the small amount of flour acts as a stabilizer to make sure everything sets properly.
Whisk the eggs and sugar together vigorously until the mixture is pale yellow and slightly thickened. This is not just about combining — you are dissolving the sugar into the eggs, which creates a smoother filling with no grainy texture. Then add the flour and whisk until absolutely no lumps remain. Even a tiny lump of flour will show up as a white speck in your otherwise silky filling.
The lemon juice and zest go in last. Give everything a final vigorous whisk, and pour immediately over the hot crust. Pouring onto a hot crust is one of the critical steps people skip, and it makes all the difference. The heat from the crust starts setting the bottom layer of filling immediately, creating a seal that prevents the liquid from soaking into the dough.
Bake until the edges are set and the very center has just the slightest wobble — like barely set gelatin. If you wait until the center looks completely firm in the oven, you will have overbaked them. Residual heat and the chilling time in the refrigerator take care of the rest.
The Art of Patience — Cooling and Chilling
This is where most people go wrong with lemon bars. The filling needs time to set fully, and that means you absolutely cannot cut into them while they are warm. I know the temptation is real. The smell alone is enough to make you want to grab a knife immediately. But patience is what separates good lemon bars from truly great ones.
Let the pan cool on a wire rack at room temperature for a full hour. During this time, the filling transitions from a soft, jiggling custard to something that holds its shape but is still delicate. Then move the whole pan to the refrigerator and chill for at least two hours. Overnight is even better.
When the bars are properly chilled, the filling will be firm enough to cut cleanly and silky enough to practically dissolve on your tongue. It is a texture you simply cannot achieve without the chilling step. The cold temperature also lets the lemon flavor shine — cold desserts need slightly more sugar and acid to taste balanced, and this recipe accounts for that.
Tips for the Cleanest, Prettiest Bars
Presentation matters with lemon bars. Part of their charm is that gorgeous contrast between the bright yellow filling and the snowy white layer of powdered sugar on top. Here are the small details that take your lemon bars from homemade to professional.
First, always chill before cutting. I use a sharp chef’s knife and run it under hot water between cuts, wiping it dry each time. This gives you smooth, clean edges instead of ragged ones. Some people use a bench scraper, which also works beautifully for getting perfectly straight lines.
Second, dust with powdered sugar at the very last moment. If you dust and then refrigerate, the sugar absorbs moisture from the filling and turns into a sticky, translucent glaze. It still tastes fine, but you lose that beautiful powdery finish. I keep the bars in the fridge undressed and dust each one right before plating.
Third, if you want a thicker layer of filling, use a 9x9 pan instead of the standard 8x8. This gives you a slightly thinner crust-to-filling ratio. For extra thick bars, you can make one and a half times the filling recipe and bake for a few additional minutes.
Variations and Flavor Twists
The beauty of this recipe is how well it adapts to different citrus flavors. The formula works with almost any citrus fruit, as long as you adjust the sugar to account for varying acidity levels.
Lemon Lavender Bars: Add 1 tablespoon dried culinary lavender to the crust mixture before pressing it into the pan. The floral notes pair beautifully with the bright lemon. Just make sure you use food-grade lavender — the stuff from the garden center is often treated with chemicals you do not want in your food.
Meyer Lemon Bars: Substitute Meyer lemons for regular lemons and reduce the sugar in the filling by 2 tablespoons. Meyer lemons are sweeter and more floral than standard Eureka lemons, so the adjustment keeps the bars from being cloyingly sweet.
Lemon Coconut Bars: Add 1/3 cup sweetened shredded coconut to the crust mixture. The tropical sweetness of coconut with the tart lemon is unexpected and genuinely addictive. It brings a chewy textural element to the sandy crust that I absolutely love.
Lemon Raspberry Bars: Scatter 1/2 cup fresh raspberries over the crust before pouring in the lemon filling. The berries sink slightly and create gorgeous pockets of raspberry throughout the tangy lemon custard. The color contrast is stunning, too.
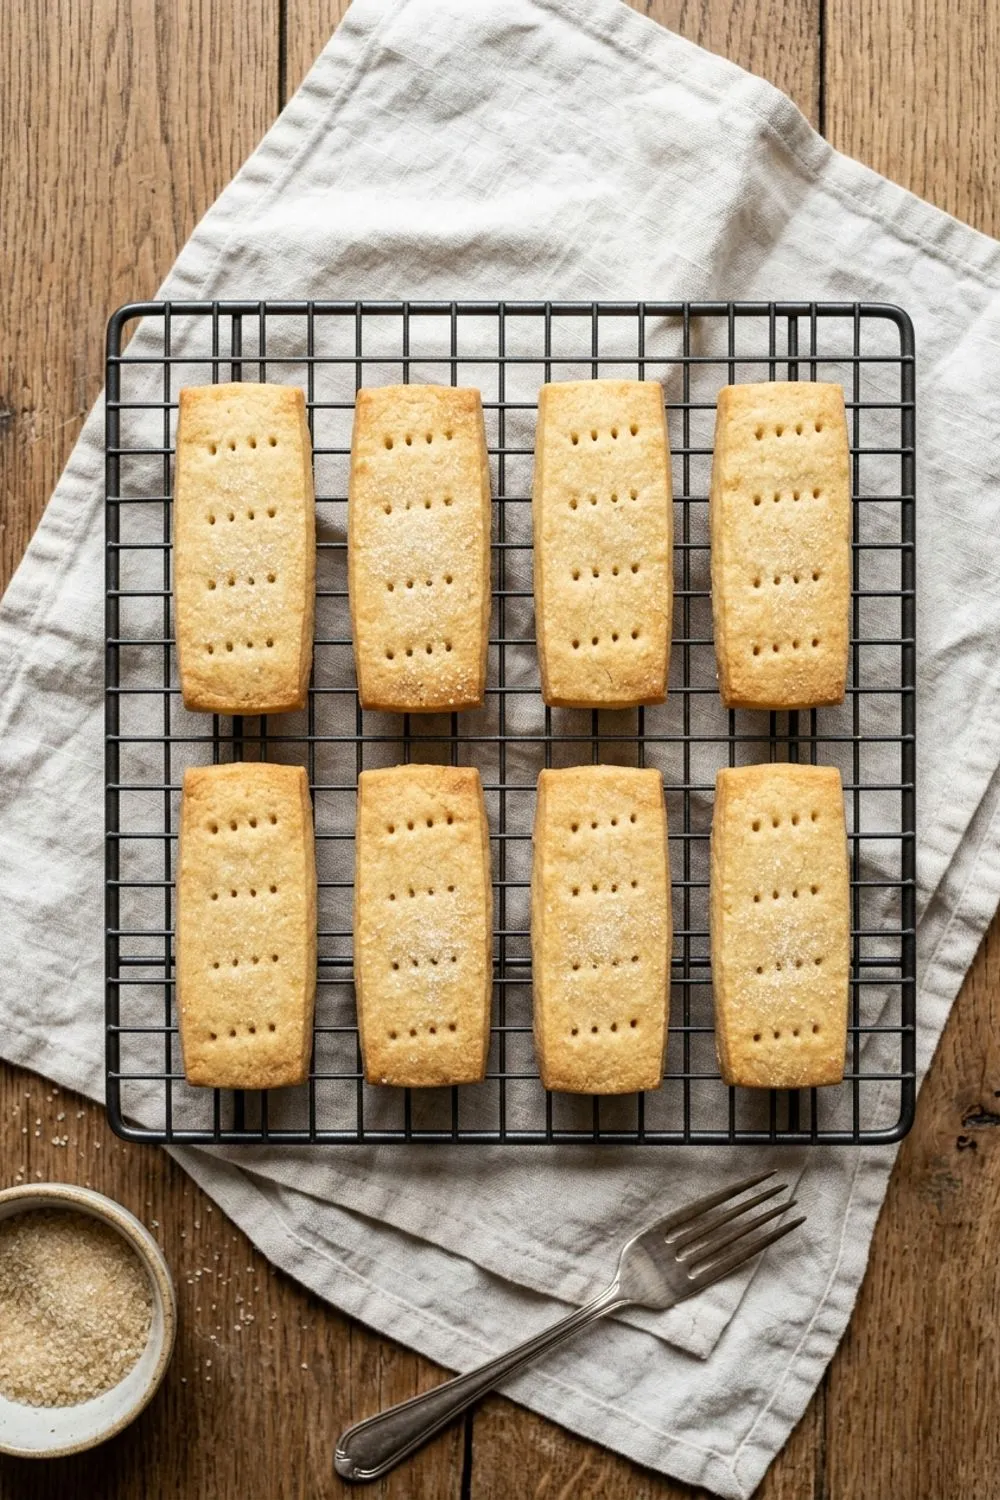
If you love the buttery shortbread crust in these bars, you should try my shortbread cookies which use a very similar dough to create tender, melt-in-your-mouth cookies that are perfect for dipping in tea.
Common Mistakes and How to Avoid Them
The crust is too hard or tough. You likely overbaked it during the blind bake step, or you overworked the dough. The crust should be pressed in gently but firmly — do not knead it like bread dough. And pull it from the oven when it is light golden, not deeply browned.
The filling is too sweet. This usually means you used bottled lemon juice, which is less acidic than fresh. Always use fresh lemons. You can also add an extra tablespoon of lemon juice to bump up the tartness without significantly affecting the texture.
The bars are crumbly and fall apart. The filling was not chilled long enough. Give them a full two hours in the refrigerator minimum. The filling needs to be cold and firm to slice cleanly. If they are still crumbling after chilling, the crust may not have been pressed firmly enough.
Powdered sugar disappears. This is completely normal — it absorbs moisture from the filling. Just dust again right before serving. For a more permanent look, some bakers use a light brushing of corn syrup on the surface before dusting, which gives the sugar something to grip onto. Personally, I just dust fresh each time.
Serving Suggestions and Occasions
Lemon bars are one of the most versatile desserts in my entire rotation. They work for casual backyard barbecues and elegant dinner parties alike. Here is how I like to serve them depending on the occasion.
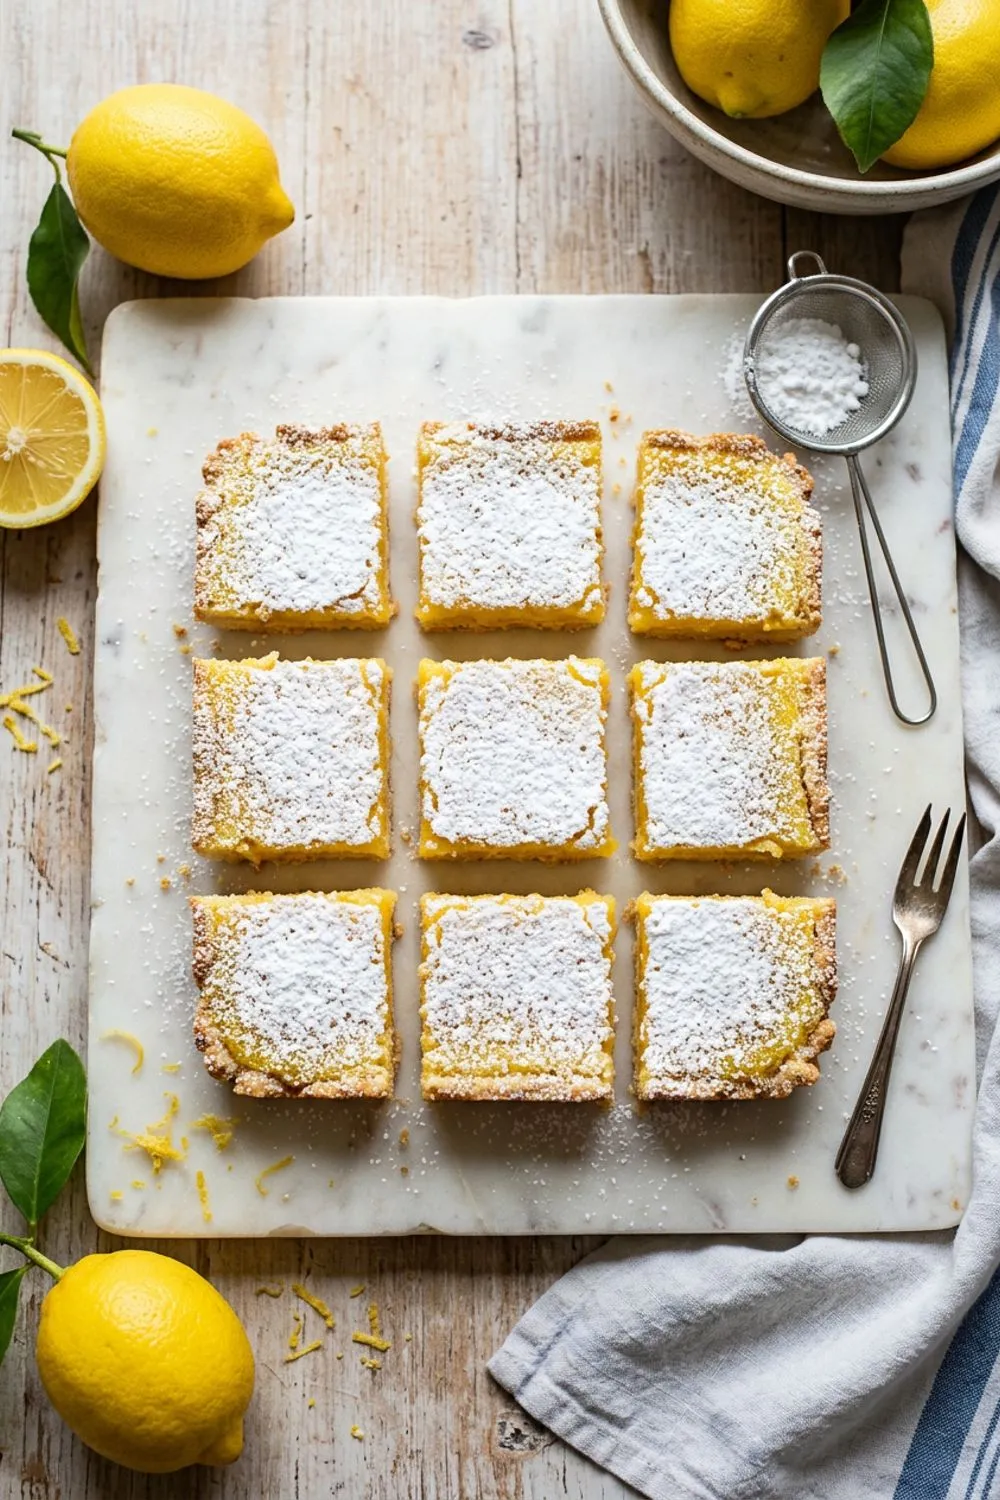
For a casual gathering, I cut them into generous squares and pile them on a platter lined with parchment paper. A little extra dusting of powdered sugar and a few thin lemon slices for garnish make them look effortlessly pretty without any fuss.
For a more formal presentation, I cut them into smaller rectangles — about 1x2 inches — and arrange them in neat rows on a slate board. A tiny sprig of fresh mint on each bar adds a pop of green that looks stunning against the yellow filling and white sugar.
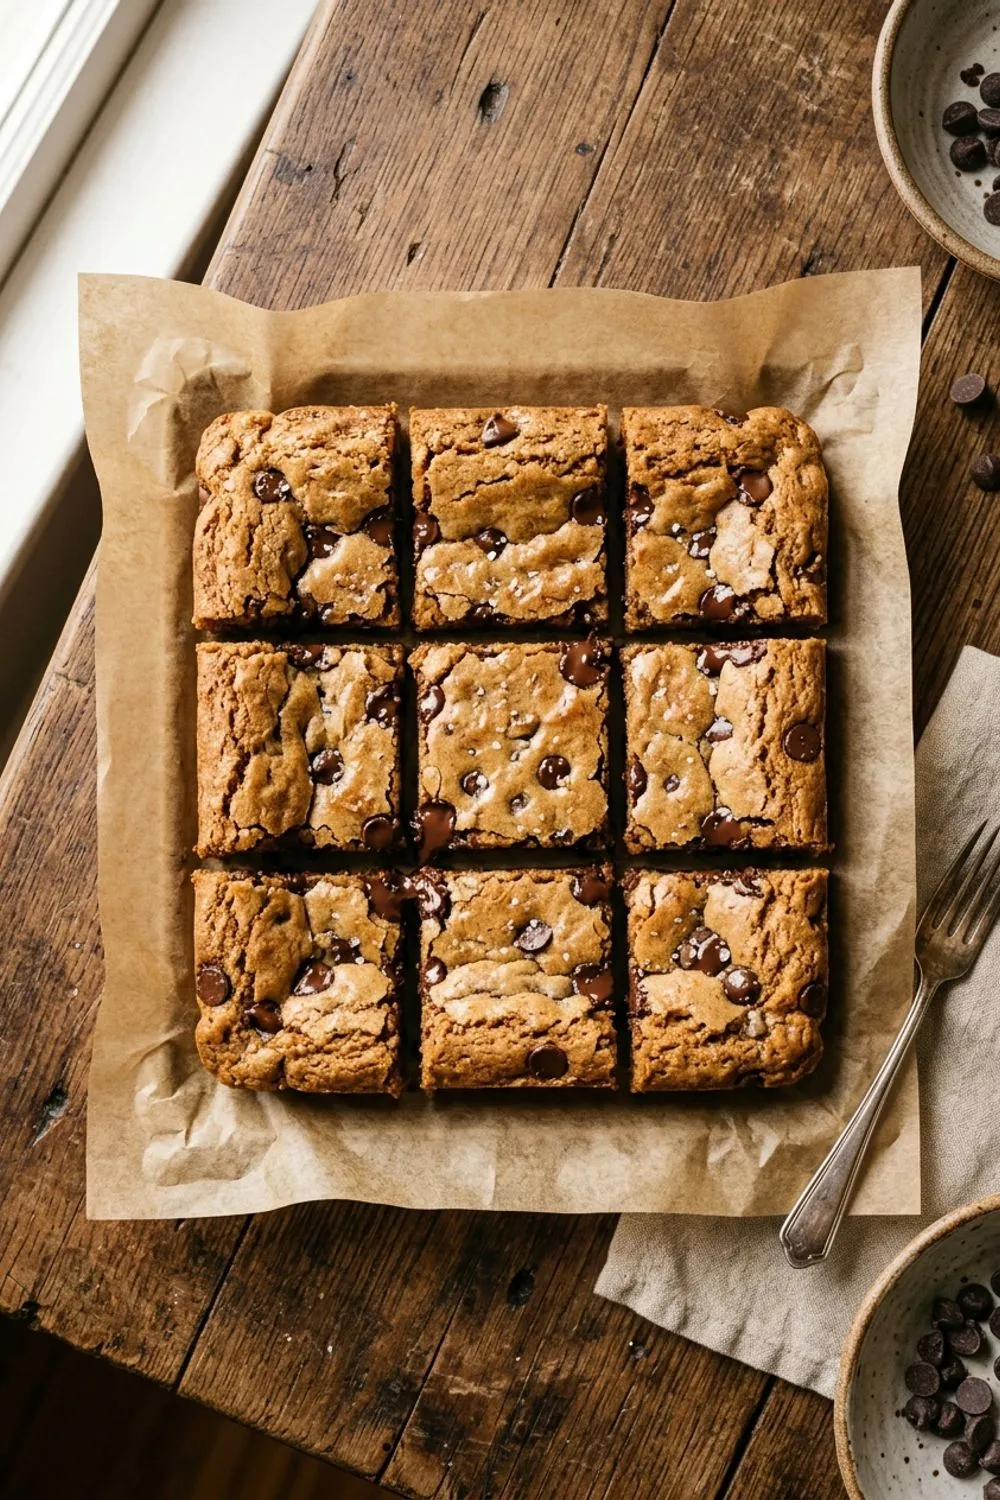
They also pair wonderfully with other desserts on a spread. Set out a tray of lemon bars alongside my blondies for a sweet and tangy contrast that gives your guests options without requiring you to bake a dozen different recipes from scratch. The butterscotch richness of blondies and the bright citrus punch of lemon bars complement each other perfectly.
For an extra special touch during the summer months, serve lemon bars slightly frozen. Pop them in the freezer for 30 minutes before serving — the filling becomes almost like a frozen custard, refreshing and cool on a hot afternoon. Pair with iced tea or a glass of crisp prosecco and you have the simplest, most elegant dessert imaginable.
These are the kind of bars that make people ask for the recipe, and the kind of recipe you will be proud to share. Once you taste them, you will understand why this is the version I have made hundreds of times and will keep making for years to come.
Making Lemon Bars Ahead of Time
One of the things I appreciate most about this recipe is how well it works for advance preparation. The full bars can be made up to three days before you plan to serve them. Bake and chill them as directed, then keep them covered tightly in the refrigerator. The texture and flavor actually improve with an extra day of resting — the filling becomes silkier, the crust softens just slightly at the boundary where it meets the filling, and all the flavors settle into harmony.
If you are preparing for a large event, you can double the recipe and use a 9x13 inch pan. Increase the crust ingredients by half and double the filling. Bake the crust for the same time but add 3-5 minutes to the filling bake time, since the larger volume takes slightly longer to set. This larger batch gives you about 24-30 bars depending on how you cut them, which is usually enough for a party.
Never Miss a Sweet Recipe
Join 5,000+ home bakers and get new recipes straight to your inbox.
Ingredients
Shortbread crust
Lemon filling
Instructions
- 1
Make the shortbread crust
Preheat your oven to 350°F (175°C). Line an 8x8 inch baking pan with parchment paper, leaving a 2-inch overhang on two sides for easy removal. In a medium bowl, whisk together 1 cup flour, 1/4 cup powdered sugar, and salt. Add the cold cubed butter and use a pastry cutter or your fingertips to work the butter into the flour until the mixture resembles coarse sand with some pea-sized pieces remaining. Press the mixture firmly and evenly into the bottom of the prepared pan.
- 2
Blind bake the crust
Bake the crust for 18-20 minutes, until the edges are just starting to turn light golden brown. The center should look set but still pale. Remove from the oven but leave the oven on — you will be pouring the filling onto the hot crust, which helps it set properly and prevents a soggy bottom.
- 3
Prepare the lemon filling
While the crust bakes, whisk together the eggs and granulated sugar in a medium bowl until smooth and pale yellow, about 1 minute of vigorous whisking. Add the 2 tablespoons flour and whisk until no lumps remain. Pour in the fresh lemon juice and lemon zest, whisking until everything is fully combined. The mixture should be thin and pourable.
- 4
Pour filling and bake
Give the filling one final whisk, then pour it directly over the hot crust. Tilt the pan gently to spread the filling evenly into all corners. Return the pan to the oven and bake for 15-18 minutes, until the filling is set around the edges and just barely jiggles in the very center when you gently shake the pan. The filling should not be puffed or browned.
- 5
Cool completely
Let the lemon bars cool in the pan on a wire rack for at least 1 hour at room temperature, then transfer to the refrigerator and chill for at least 2 hours or overnight. The filling will continue to set as it cools. Once fully chilled, lift the bars out using the parchment overhang.
- 6
Dust and serve
Just before serving, dust the top generously with powdered sugar using a fine-mesh sieve. Use a sharp knife to cut into 16 squares, wiping the blade clean between each cut for the neatest slices. Serve cold or at cool room temperature.
Nutrition Information
Per serving (serves 16). Values are approximate.
| Calories | 220 calories |
| Total Fat | 9g |
| Saturated Fat | 5g |
| Carbohydrates | 33g |
| Sugar | 23g |
| Protein | 3g |
| Sodium | 65mg |
| Fiber | 0g |
* Percent Daily Values are based on a 2,000 calorie diet. Your daily values may be higher or lower depending on your calorie needs. Nutritional information is an estimate and may vary.
Frequently Asked Questions
How do I prevent a soggy crust on my lemon bars?
The key is blind baking the crust until it is light golden and pouring the filling onto the hot crust straight from the oven. This creates a seal that keeps the crust crisp. Also make sure you press the crust dough firmly and evenly — any thin spots will absorb moisture faster.
Can I use bottled lemon juice instead of fresh?
Fresh lemon juice makes a significant difference here — bottled juice often tastes flat and slightly bitter compared to fresh. You need about 3 large lemons for 1/2 cup of juice. If you absolutely must use bottled, choose one that is 100% lemon juice with no additives, but the flavor will not be as vibrant.
How should I store lemon bars?
Store lemon bars covered in the refrigerator for up to 5 days. Wait to dust with powdered sugar until just before serving, as it dissolves into the filling over time. You can also freeze undusted bars wrapped tightly in plastic wrap for up to 2 months — thaw overnight in the refrigerator.
Why is my lemon filling runny or not setting?
The most common cause is underbaking. The filling should be set around the edges with only a very slight jiggle in the center when you remove it from the oven. It firms up considerably as it cools and chills. Make sure to refrigerate for at least 2 hours before cutting. Also ensure you used the full 2 tablespoons of flour in the filling.

Reader Reviews
Based on 192 reviews